More and more businesses today are implementing automated workflows and want autonomy over it. To remove the developer-dependency of automation, several no-code tools have been introduced. With these no code tools, you can take the applications you already use and seamlessly connect them with triggers and actions from other apps within minutes - and without any coding experience.
In this post, I will show you how to automate your SIM management workflows with EMnify and one such no-code tool: Zapier.
Why Zapier?
Zapier helps customers grow their businesses by connecting web apps with the power of automation. And, EMnify just became one of those connected apps!
With Zapier, you can now create automated workflows with EMnify APIs and operations tools of your choice without knowing how to code.
Prerequisites
- EMnify Account - if you do not have an account yet, sign up for free at portal.emnify.com.
- EMnify SIM card - if you do not have an EMnify SIM card yet, get a free eSIM in your EMnify portal.
- Your SIM must be registered on the EMnify portal.
- Zapier Account - if you do not have an account yet, sign up for free at zapier.com.
Benefits
- Create automated workflows with EMnify API and DataStreamer
- Use tools of your choice like Slack, Excel, Email etc.
- No coding required
Use Case
Connectivity is an essential part of your IoT systems and your business operations depend on it. Debugging connectivity issues is already a tedious task and then to find out that your device was suspended because you reached your usage limit, is annoying. This is something that can be completely avoided and taken care of preemptively. That's exactly what we will be doing today with an EMnify SIM, Zapier and our current favorite tool, Slack!
Solution
With Zapier, we will create an automated workflow where you can get a message on your preferred tool when your device reaches its usage limit. Now that you know this, you can select a service profile with a higher limit for that device and avoid loss of connectivity.
As part of the first release of the EMnify application on Zapier, we have included the Usage Limit Reached event which can trigger all sorts of actions. All you need to do is create the Zap (automated workflow) once and this process is then automated. Let's take a look at how to receive a message on Slack when your device reaches the usage limit.
Step 1: Create an Application Token on your EMnify Account
This will be used to authenticate the account in Zapier whenever you create a workflow or Zap.
-
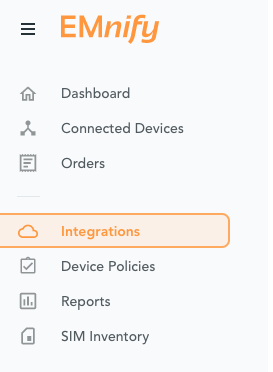
Head to the portal and sign in.
- Select Integrations
- Scroll down until you reach Application Tokens
-
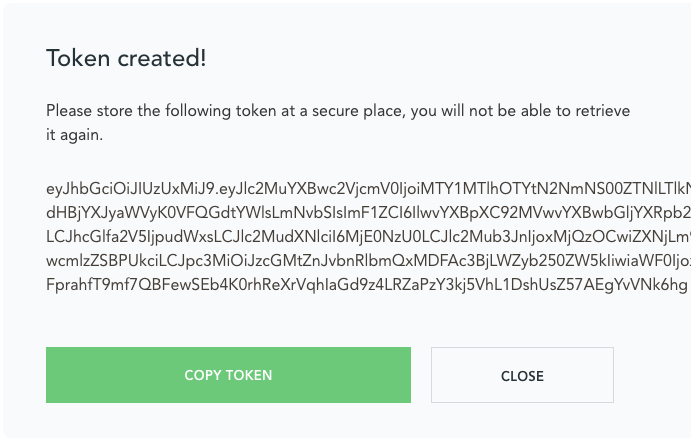
Add a token
-
Add a Description and optionally add an Expiry Date or IP restriction
- Create the token and Copy this for when we authenticate in Zapier
Step 2: Post a Message in Slack when your Usage Limit has been Reached
Using the Usage Limit Reached Trigger, you can get notified whenever your device’s Usage Limit has been reached.
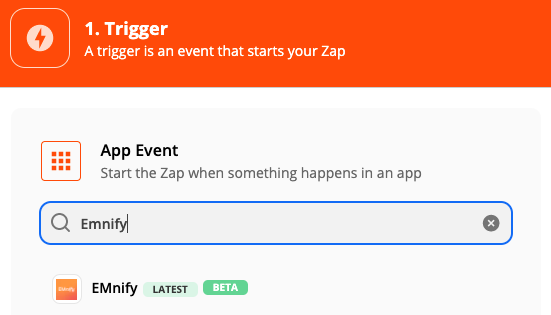
- Create a new Zap in Zapier.
- Search and click on the Slack App in the App Event Search bar.
- Create a
Usage Limit Reachedtrigger and click Continue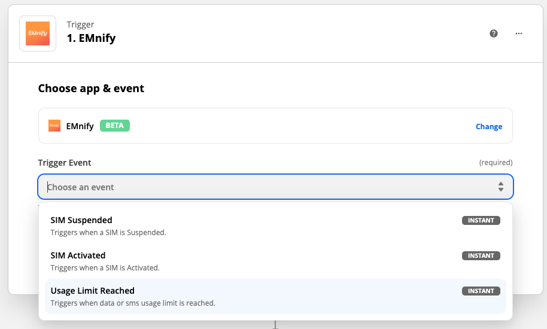
- Choose your account you authenticated and click Continue
- Test your trigger
- If you have a
Usage Limit Reachedevent, Zapier should find a recent event in your EMnify account. -
If Zapier can’t find a SIM suspended in your account, don’t worry - this just means you haven’t had any
Usage Limit Reachedevents recently. You can skip this test.
- If you have a
-
Follow the prompts until you are ready to set up your Action.
- Search and click on the Slack App in the App Event Search bar.
-
Under Action Event, select
Send Channel Messageand click Continue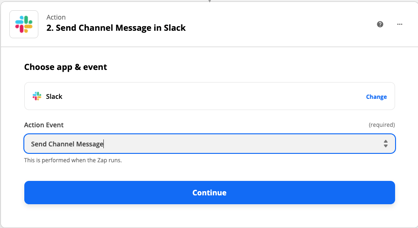
- Sign in to your Slack account and click Continue
- Select the Channel you would like the
SIMSuspendedtrigger to post to. - Enter in the message text - any text or data we offer as part of the event to be used dynamically in the Slack message post.

- Now, whenever your device reaches the Usage Limit you’ve set in the portal, it will post to Slack!

-
Just one last thing, turn on your Zap!
Assumptions/Limitations
- The way trigger tests work is that an actual event from the event used in the trigger is tested for in the user’s account in EMnify
- If an event as part of the trigger exists, it shows this data in Zapier as the test result
- if an event as part of the trigger does not exist, the test ‘fails’, we show a sample data result, and the user needs to Skip Test Trigger
- For Usage Limit Reached Trigger, the user needs to have a service limit set at a given amount for the limit to throw an event. This is done via the EMnify Portal. After setting a limit on the portal and creating a zap with this trigger, this trigger will fire whenever this limit is reached.
Looking Forward
In this post, we explained how to use the Usage Limit Reached event with Slack. But you can replace Slack with other tools – like email or any messaging tool of your choice – and easily recreate this workflow in Zapier.
This is just the beginning for EMnify's integration with Zapier. We have already received many feature requests from our beta users and our team is working hard to integrate a wider range of APIs and events into Zapier.
In future releases, we even want to move past copy-catting our existing workflows in the portal to create brand new events, APIs, and workflows to fit your needs.
Do you have any specific ideas or use cases for us? Or you want to share how you use the integration? Reach out to us at productmarketing[at]emnify[dot]com.
See you next time!

Thomas Carrier
Thomas is passionate about well-designed software products, improving business workflows, and enabling organizations and customers with the tools and data they need.