
IoT Hub is a service provided by Microsoft Azure that allows management of IoT devices and data at scale. This guide will focus on creating an IoT Hub and onboarding a Raspberry Pi as an example device.
Prerequisites
The prerequisites for receiving device data in Azure IoT Hub are:
- A device with a cellular modem (in this example we use a Rasberry PI).
- The device needs to support to send data via HTTP, Websockets or MQTT.
- The Raspberry Pi needs to have git & node installed. For Node.js, follow these install instructions.
- An Azure Account with an active subscription
Benefits
- Securely authenticated and encrypted communication between device and cloud
- Open source development tools for sending device sensor data or telematics to Azure
- Management platform for connecting, monitoring, and controling device fleets
- Granular control of device permissions by grouping by device type or tag
- Remotely orchestrate device logic from the Azure IoT hub such as firmware upgrades
Note: Customers using Azure IoT Hub can take advantage of securing device data using EMnify Cloud Connect.
Create an IoT Hub
1. In your Azure account, navigate to Home > IoT Hub and click + Add

2. Provide details about the hub which must include the subscription model, the deployment region and a name
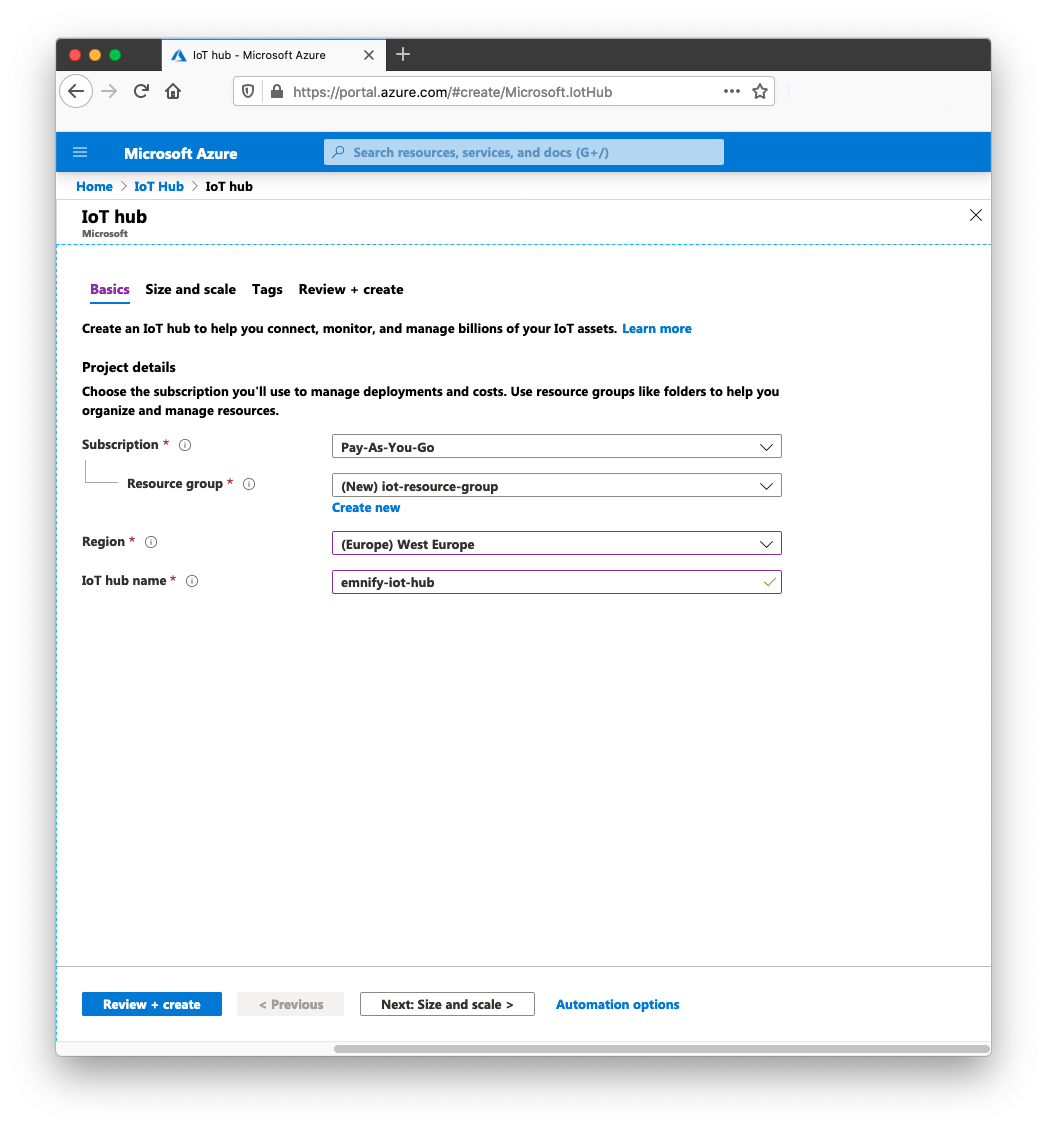
3. (Optional) Provide the scale of the deployment which depends on the number of messages sent to the hub daily. Select an S1 Standard Tier and click Next

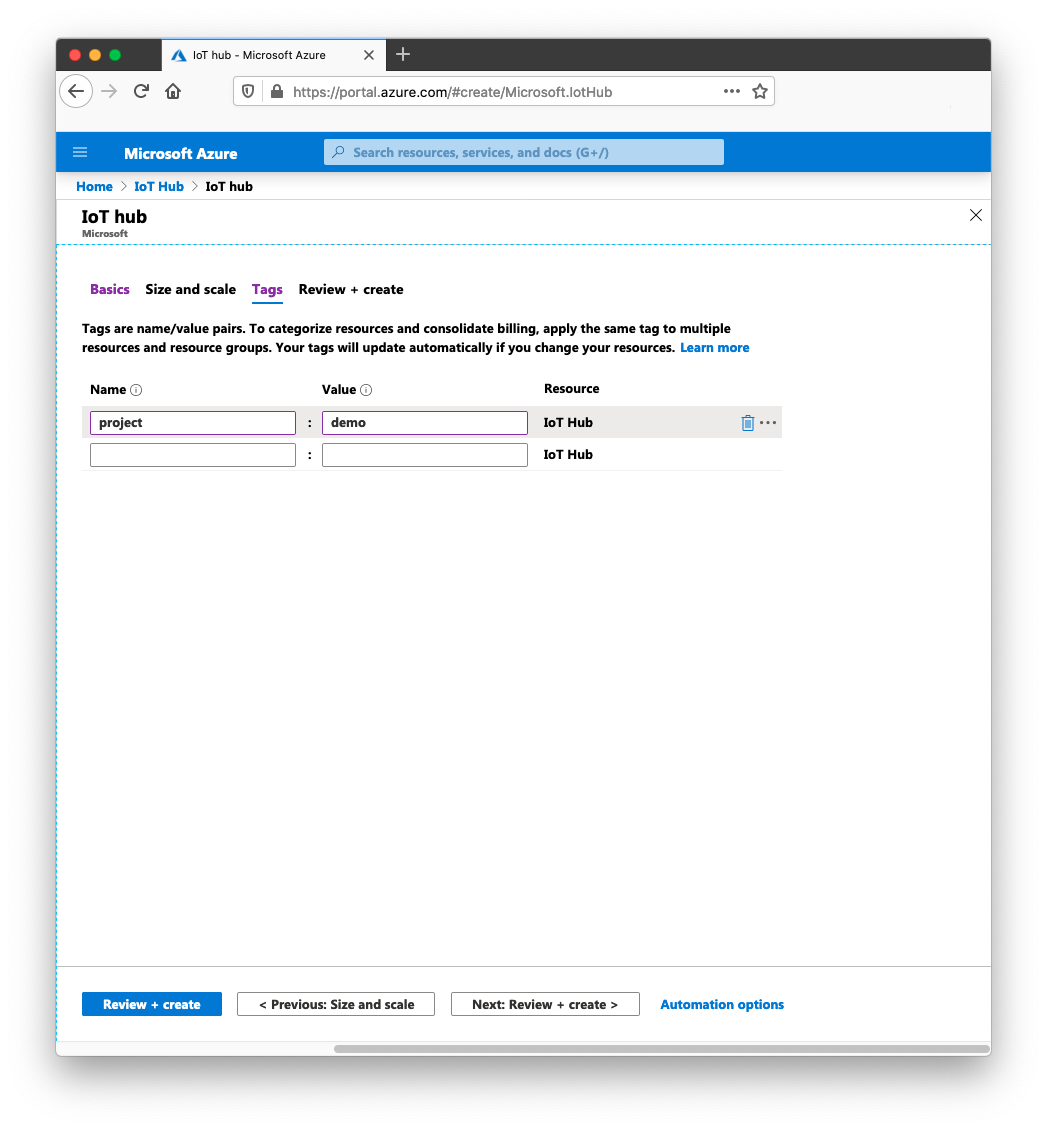
4. (Optional) Tagging the resources will help keep track of projects within Azure. Provide an identifier and click Next
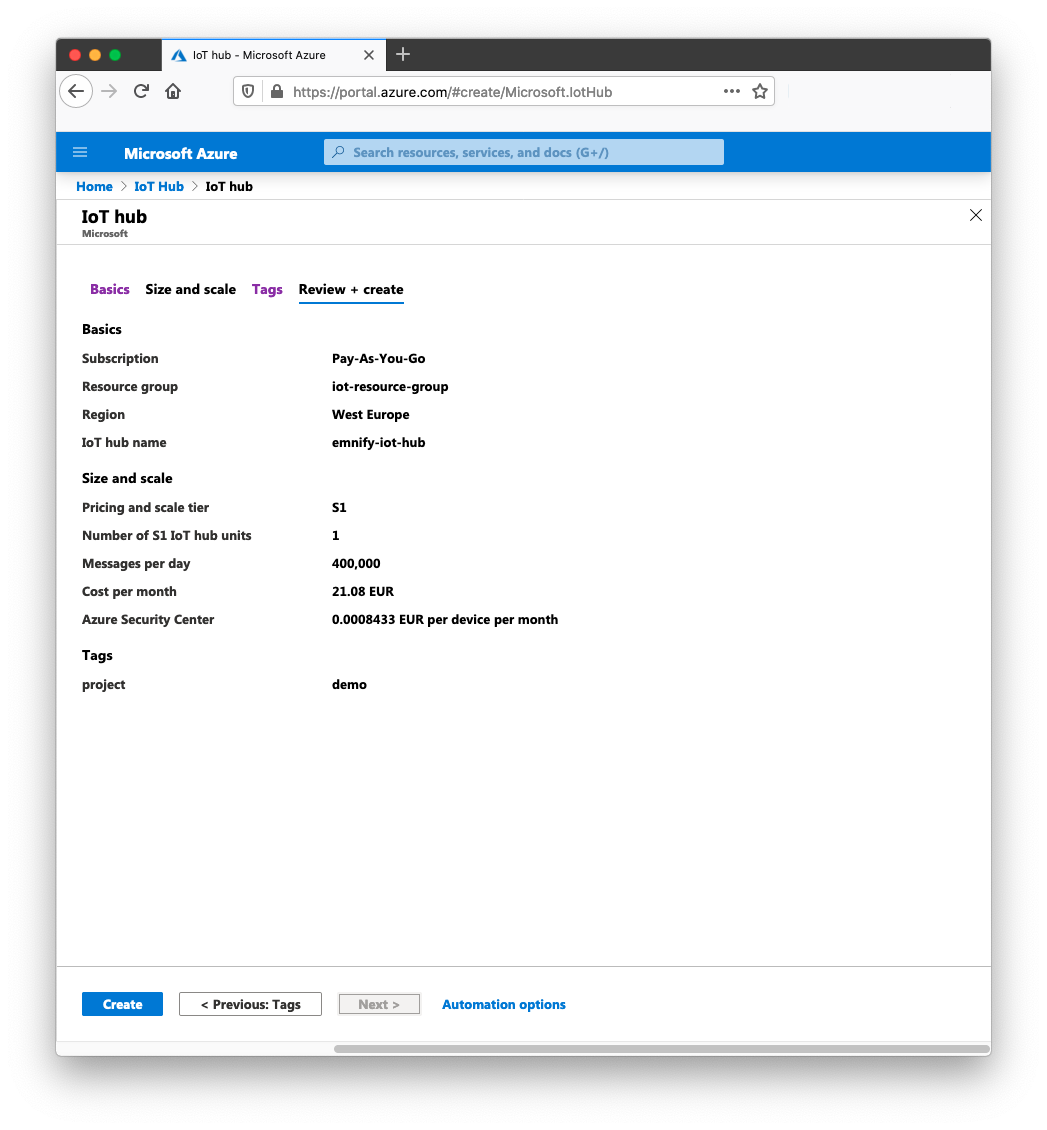
5. Confirm that the details of the deployment are correct and click Create
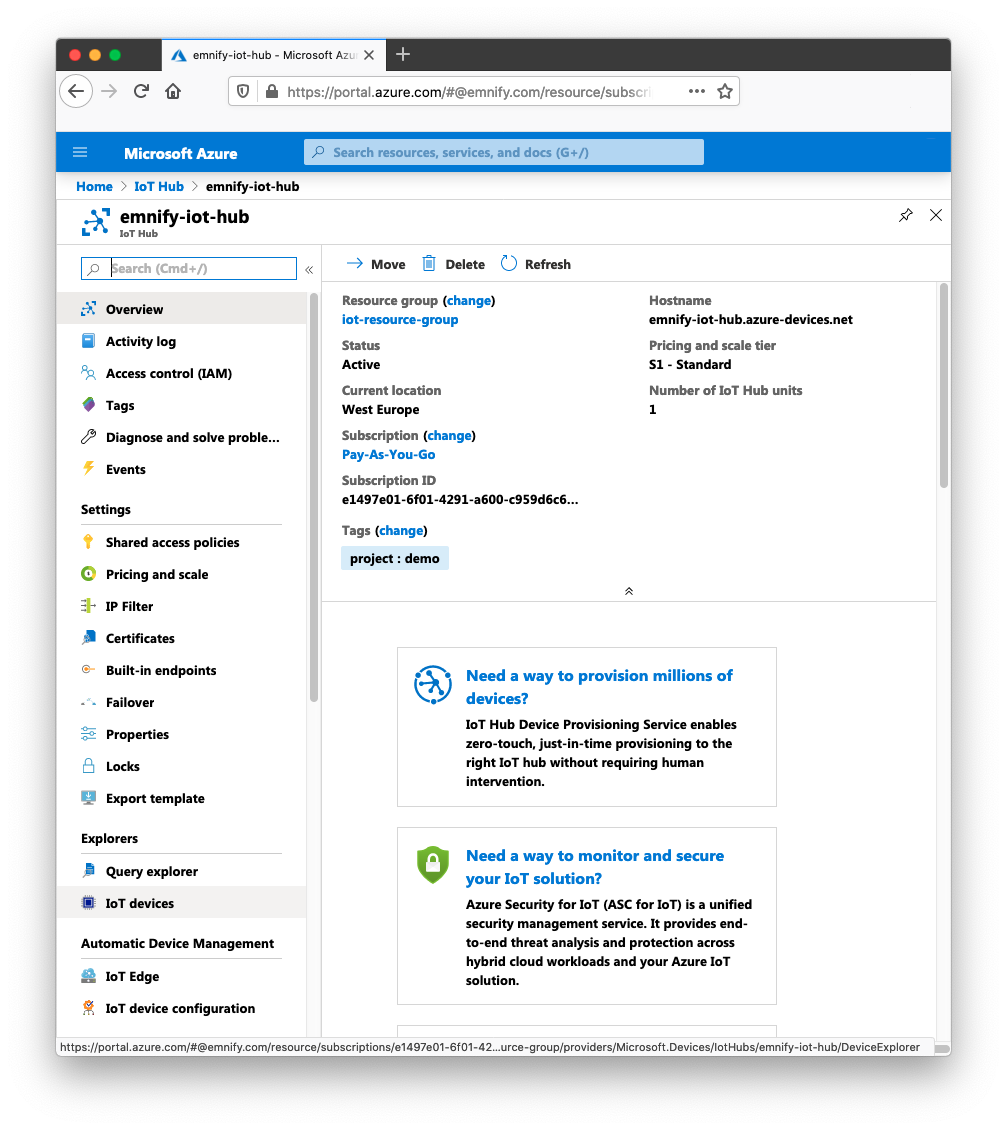
You have successfully created an IoT Hub in Azure! After one or two minutes, the new IoT Hub will be deployed, activated and ready to onboard devices.
Device Configuration
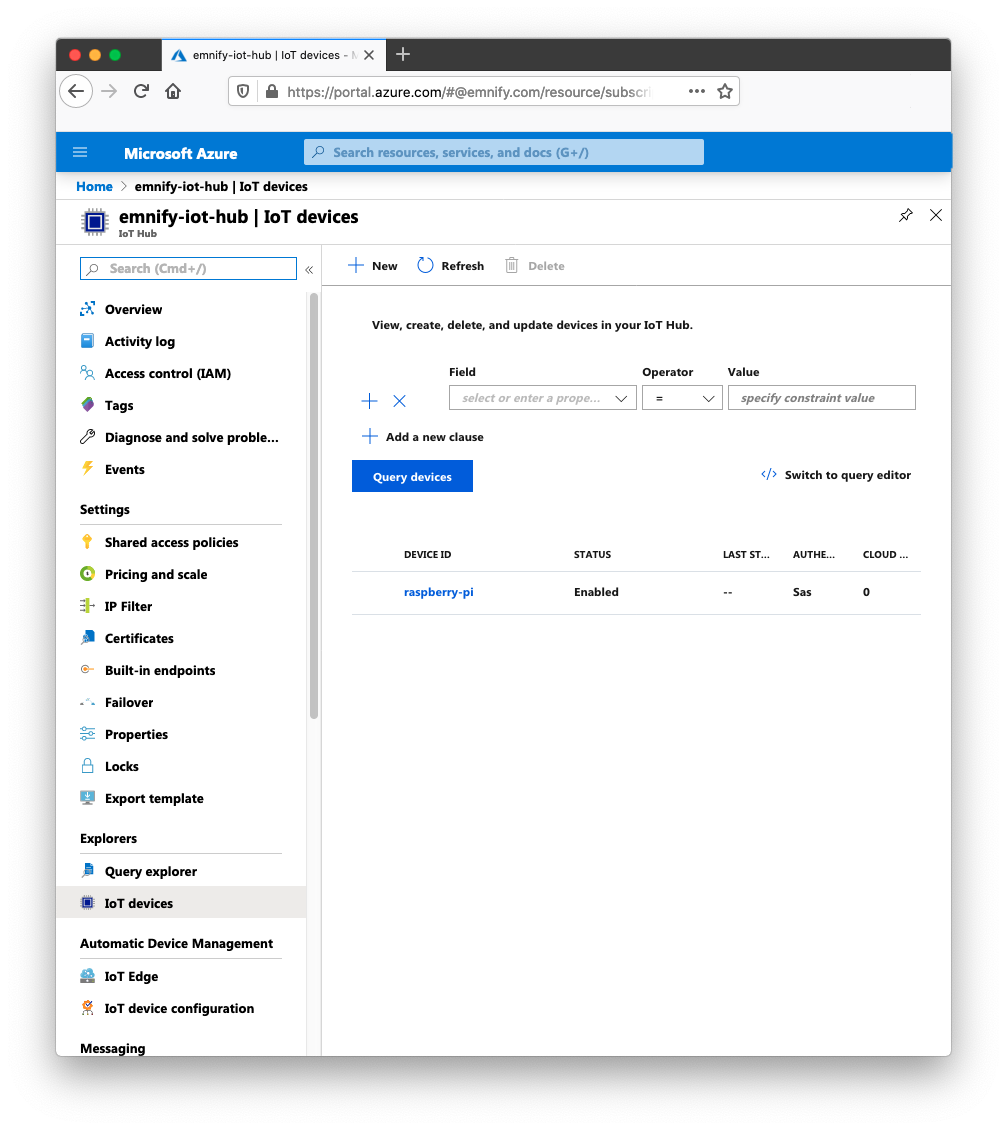
1. In the newly-created IoT Hub, navigate to IoT Devices in the left-hand menu and click + New
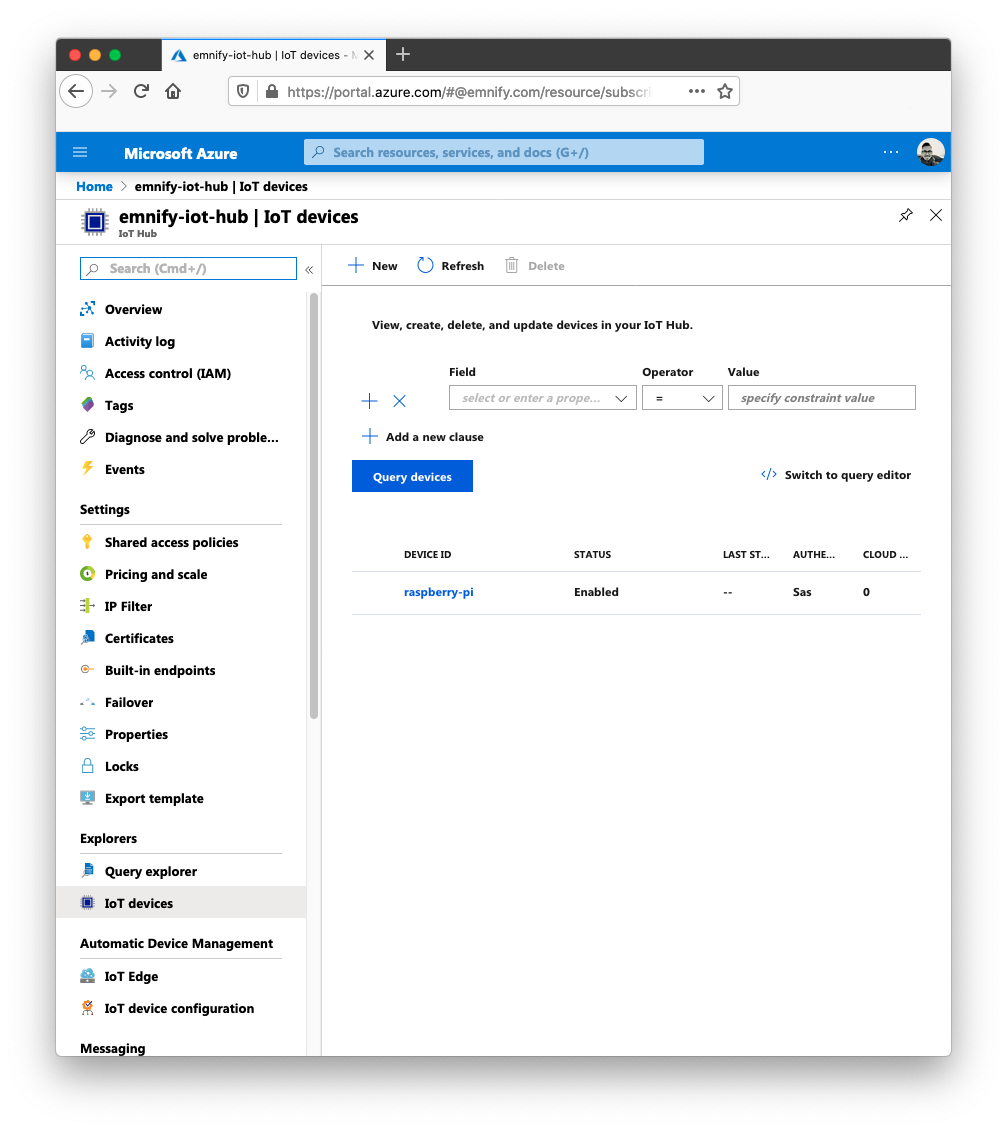
2. Give the device a unique ID and select the authentication type. For this example, select Symmetric Key.
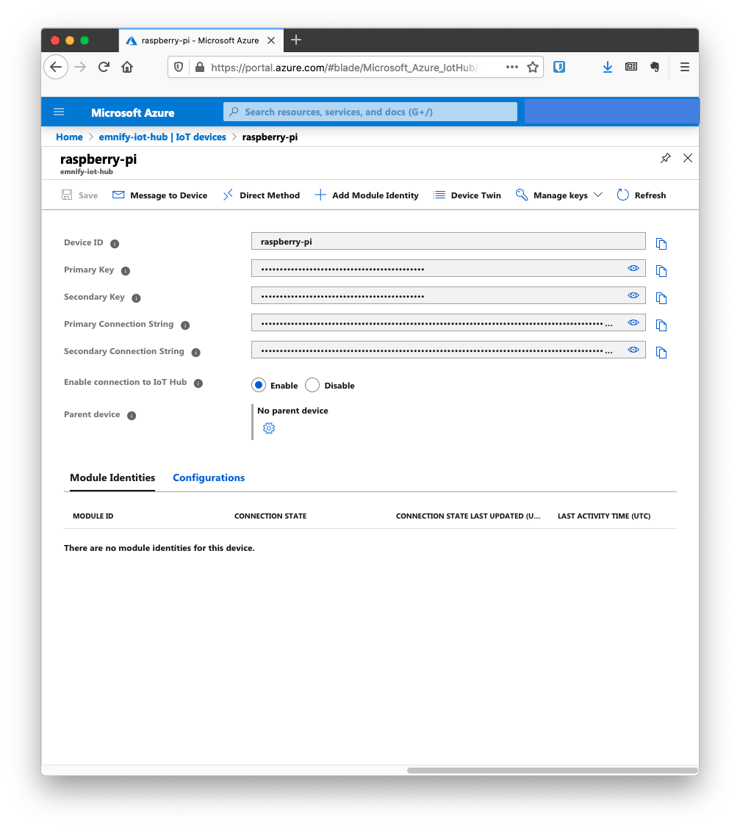
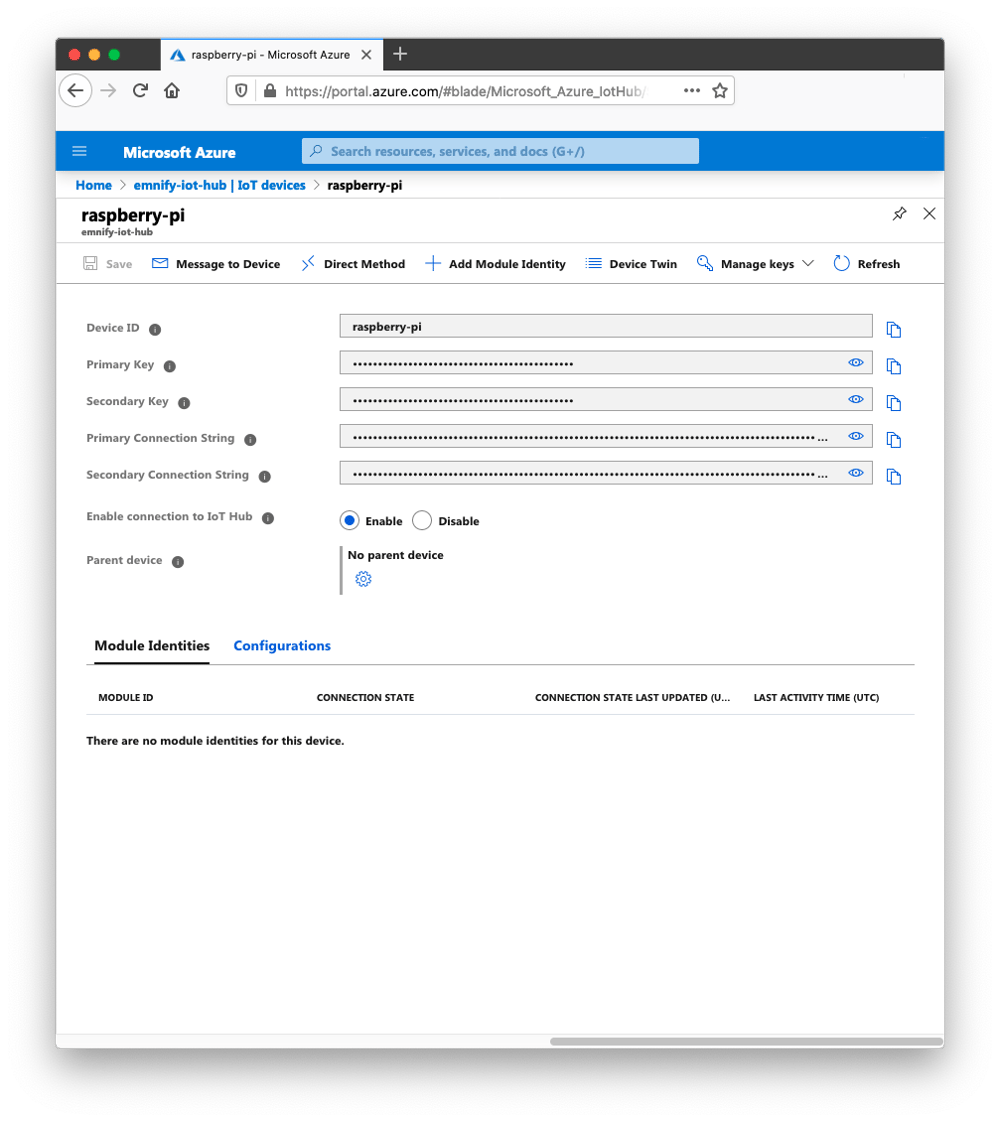
3. The new device will be shown in the devices view as enabled. Click on the device id to see the details of the newly-added device.
4. Click the clipboard icon to the right of the Primary Connection String to copy the secret value to your clipboard. This secret will be used in the example below as the DEVICE_CONNECTION_STRING value and should be kept securely!
5. On the Raspberry Pi, clone the Azure IoT examples repository and update the device shadow using the provided Node.js script:
git clone git@github.com:Azure-Samples/azure-iot-samples-node.git
cd azure-iot-samples-node/digital-twins/Samples/device/javascript/
# install dependencies
npm install
export DEVICE_CONNECTION_STRING={your device connection string}
node sample_device.js
The device state is updated in the Azure IoT Hub using the Digital Twin:

Adding sensor data
For adding real sensor data into the Device Twin, users should modify the environmental sensor calls to read actual values from a sensor instead of sending dummy data to Azure IoT: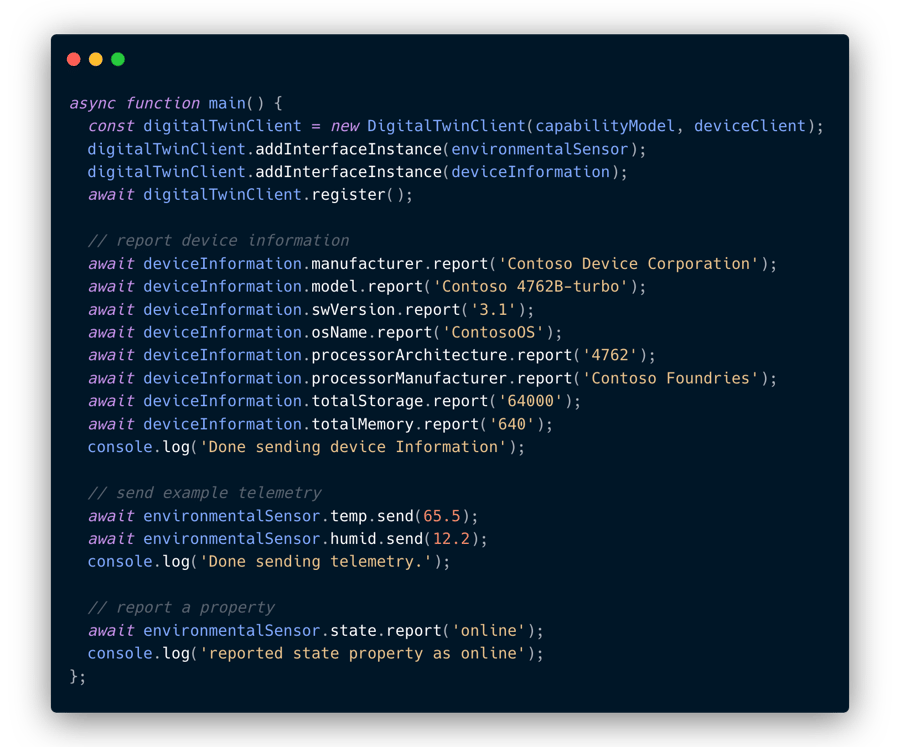
Scaling up
Azure provide a service called a Device Provisioning Service which can be used as a challenge-response server to authenticate devices and enrol them in specific IoT Hubs at scale. There are several methods for checking the identity of the device before creating an entity and registering a device in IoT Hub which are referred to as attestation mechanisms which can be:
- Hardware security module for storing X.509 certs or SAS tokens (recommended)
- Trusted Platform Module (TPM) using a nonce challenge
- Signed X.509 certificated on the device
When enrollment requests arrive from the IoT device, the Device Provisioning Service will check the validity of the secret (signed cert or shared secret) and will register the device in the relevant IoT Hub. The Device Provisioning service will then send connection credentials back to the device so that it uses the correct connection ID and can securely communicate with the Azure platform. For more information about this service, see the Behind the Scenes section of the Device Provisioning Service documentation.
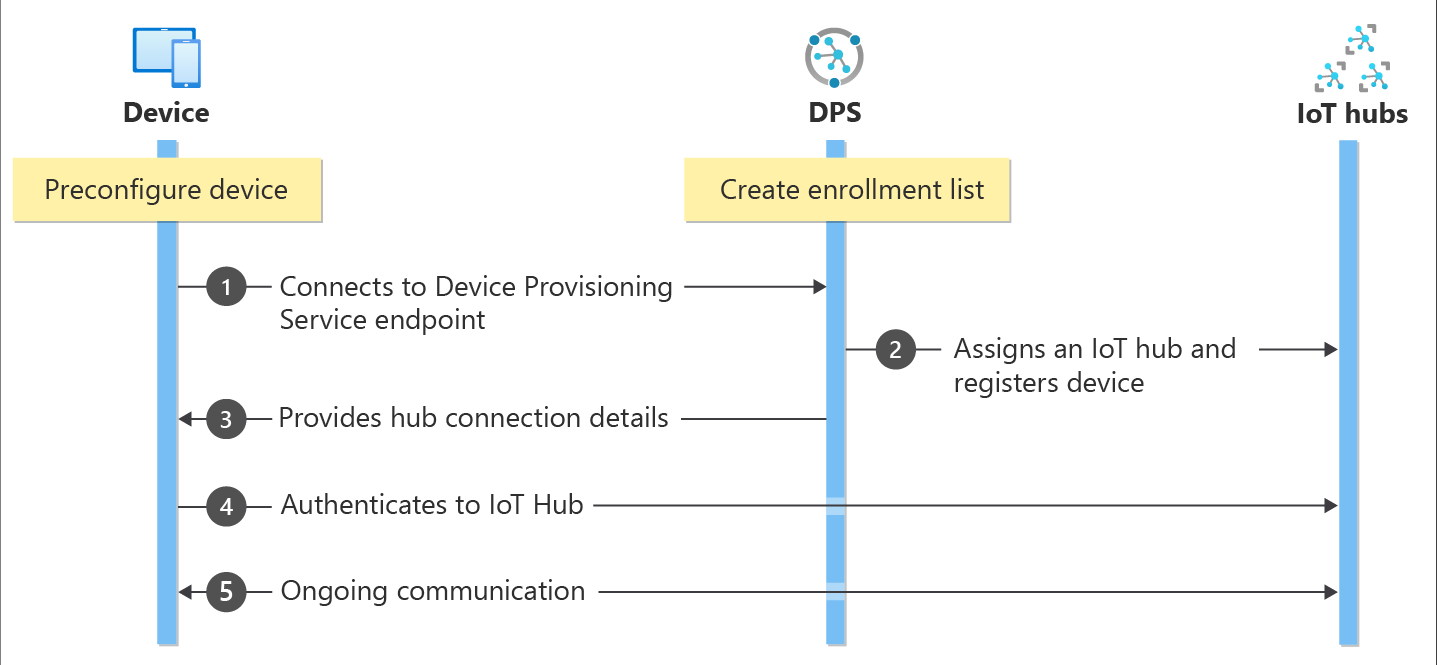
- Device manufacturer adds the device registration information to the enrollment list in the Azure portal.
- Device contacts the DPS endpoint set at the factory. The device passes the identifying information to DPS to prove its identity.
- DPS validates the identity of the device by validating the registration ID and key against the enrollment list entry using either a nonce challenge (Trusted Platform Module) or standard X.509 verification (X.509).
- DPS registers the device with an IoT hub and populates the device's desired twin state.
- The IoT hub returns device ID information to DPS.
- DPS returns the IoT hub connection information to the device. The device can now start sending data directly to the IoT hub.
- The device connects to IoT hub.
- The device gets the desired state from its device twin in IoT hub.
Next Steps
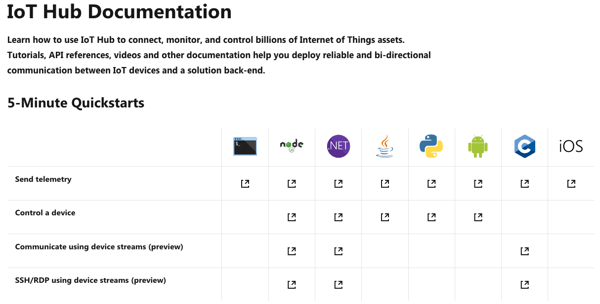
The Azure IoT Hub documentation hosts several example projects using multiple programming languages and frameworks which may be used to send device data to the cloud and interact with the device remotely if needed. For more examples, see the Azure IoT Hub quickstart guides.

emnify
The content team of emnify is specialized in all things IoT. Feel free to reach out to us if you have any question.