IoT devices come in various shapes and sizes. And with that, security can vary from device to device depending on the platform, components, OS, firmware and application. In this post, I will use a mobile phone (Android/ iOS) as a payment terminal and outline how you can use DNS filtering to restrict internet access on all such devices in a centralized way.
The recent pandemic has forced businesses world wide to move to cash-less and contact-less payment options. (Well, maybe Germany didn't get the memo. We love cash here!) This is where mobile devices as a payment terminal come across as a cheaper, quick to implement alternative. Buying generic mobile devices and turning them into payment terminals has its own problems. You have less control over the hardware security aspects. You don't have much control over the software security either unless you write your own OS after wiping the existing one. What you can do though is manage the internet access to and from these devices while making sure that communication to your server is secure and undisturbed.
DNS filtering is a convenient technique to restrict this data access from the mobile devices. Normally you'd have to install standalone DNS filtering services on all of these devices individually. Managing and maintaining these can be a nightmare once they are shipped. With the EMnify Communication Platform, you can manage and maintain this DNS filtering from your SIM network in a centralized way. You do not need to install DNS servers on every device, but can do this by maintaining just one list of the websites you want to filter.
Moreover, DNS servers can otherwise be easily attacked through DDoS if these endpoints have a public IP. With EMnify Cloud Connect, we are going to establish connectivity to a private DNS server, further securing your network. Let's dig into how exactly this is done.
But First..
First things first, get yourself a free EMnify account and an IoT SIM. You can also try this experiment with our developer eSIM.
Step 1 : Set up a Transit Gateway
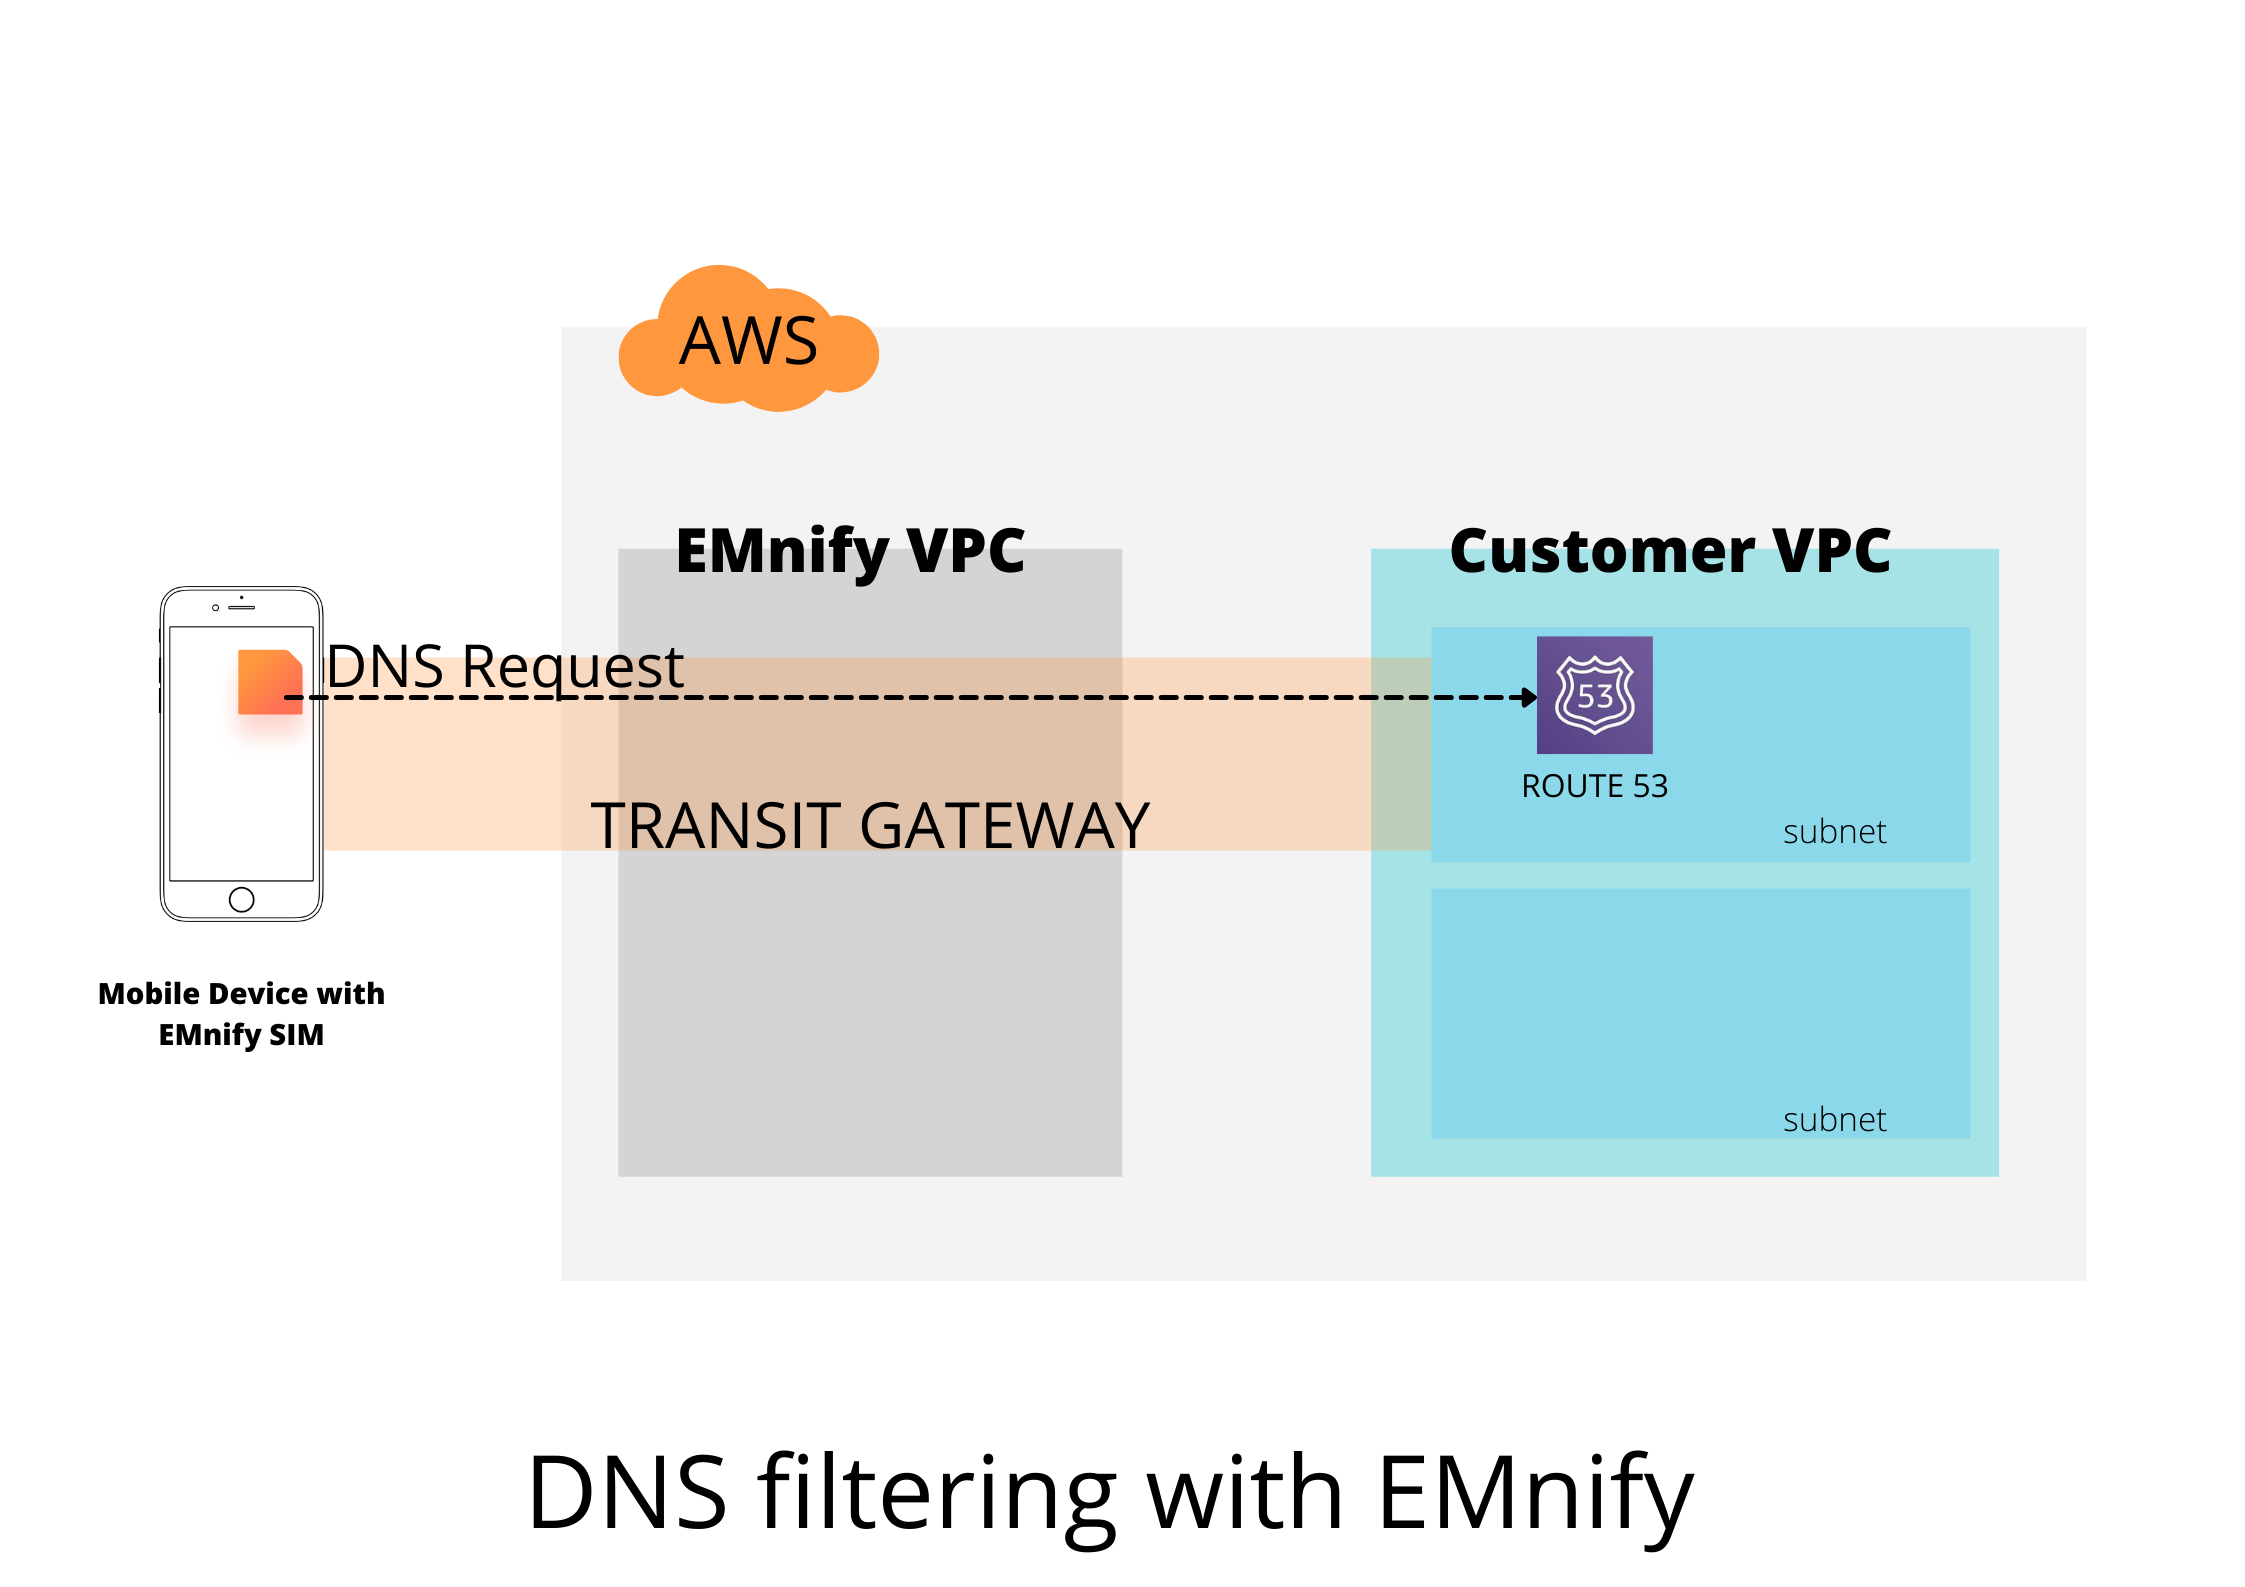
For implementing web filtering, we will be running a DNS server in your AWS VPC. But you do not want this server to be accessible by all. So as a first step, we will be using a Transit Gateway to create a secure and private connection between the EMnify network and the subnet in your VPC where this DNS server will run. To set-up the Transit Gateway, refer to this integration guide.
Step 2 : Route 53
AWS has recently launched the Amazon Route 53 - its DNS service which can resolve domain names. We will be using this service by redirecting all queries coming from your devices using EMnify SIM cards. You can check the pricing for Amazon Route 53 here. Go to your AWS console and navigate to the Route 53 service page.
Click on Get Started > Configure DNS Resolvers.
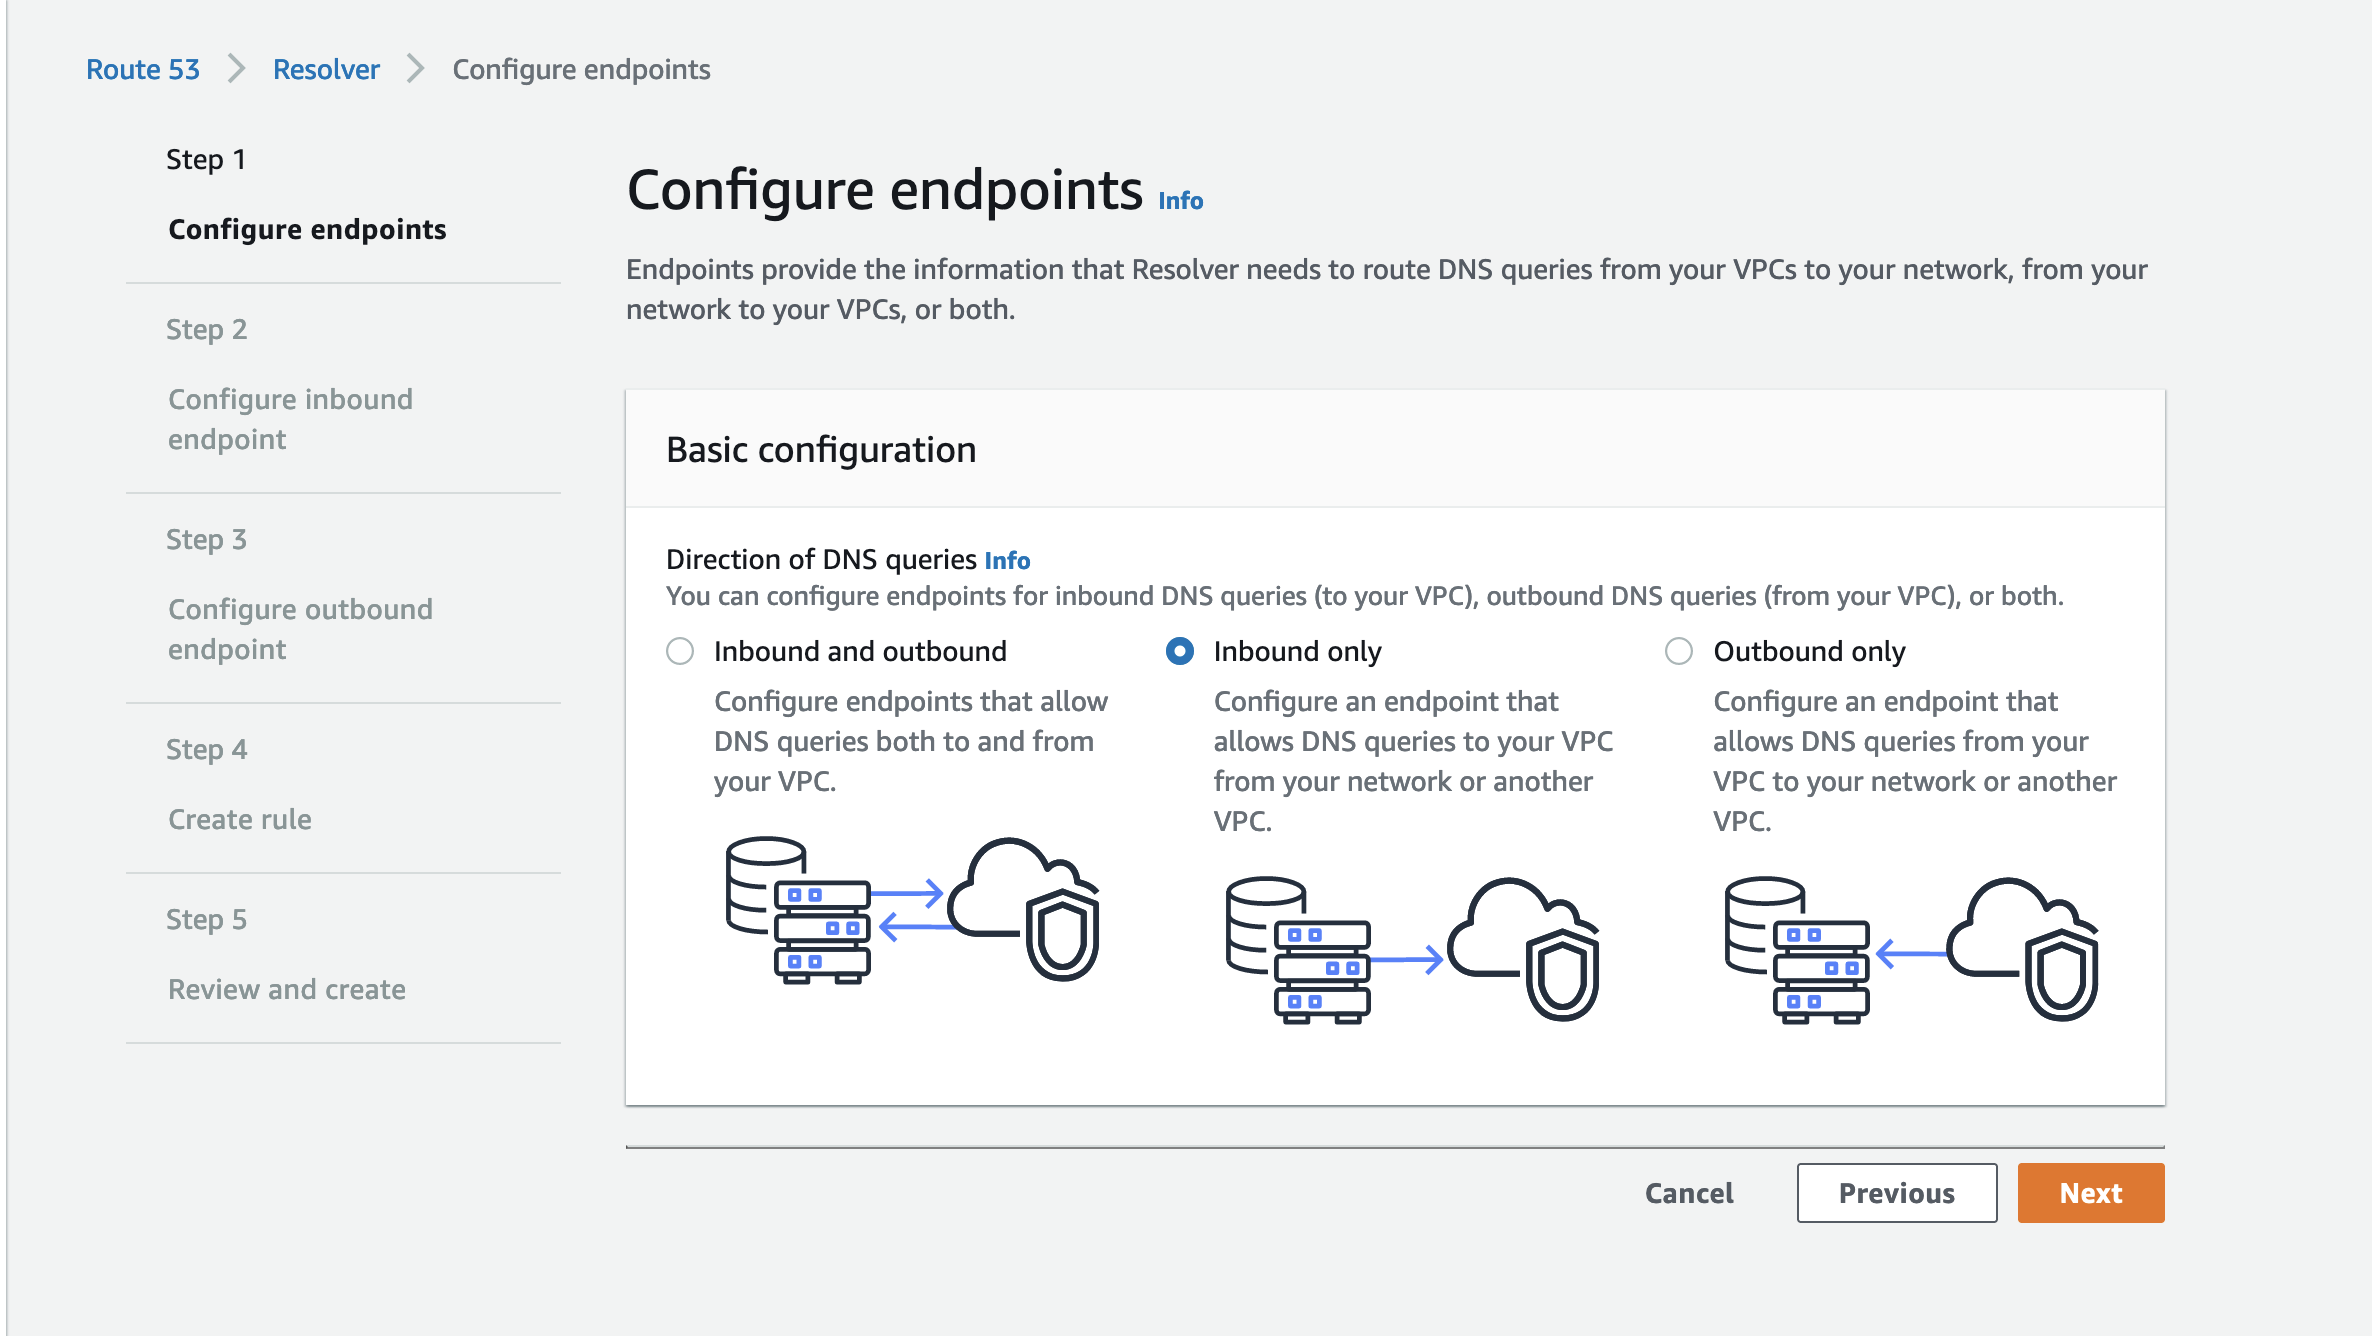
In the Basic configuration, select the option Inbound only. IMG. We will be forwarding the DNS queries originating in our SIM cards into this resolver. This is why we need to configure an endpoint that allows DNS queries to the resolver in this VPC.
Next give it an appropriate name and select the VPC and subnet and availability zone where you created the Transit Gateway in the previous step. Select the security group that you created in the Transit Gateway step which allows inbound access from the IPs of your EMnify SIM. Let the IP addresses for these endpoints be assigned automatically. 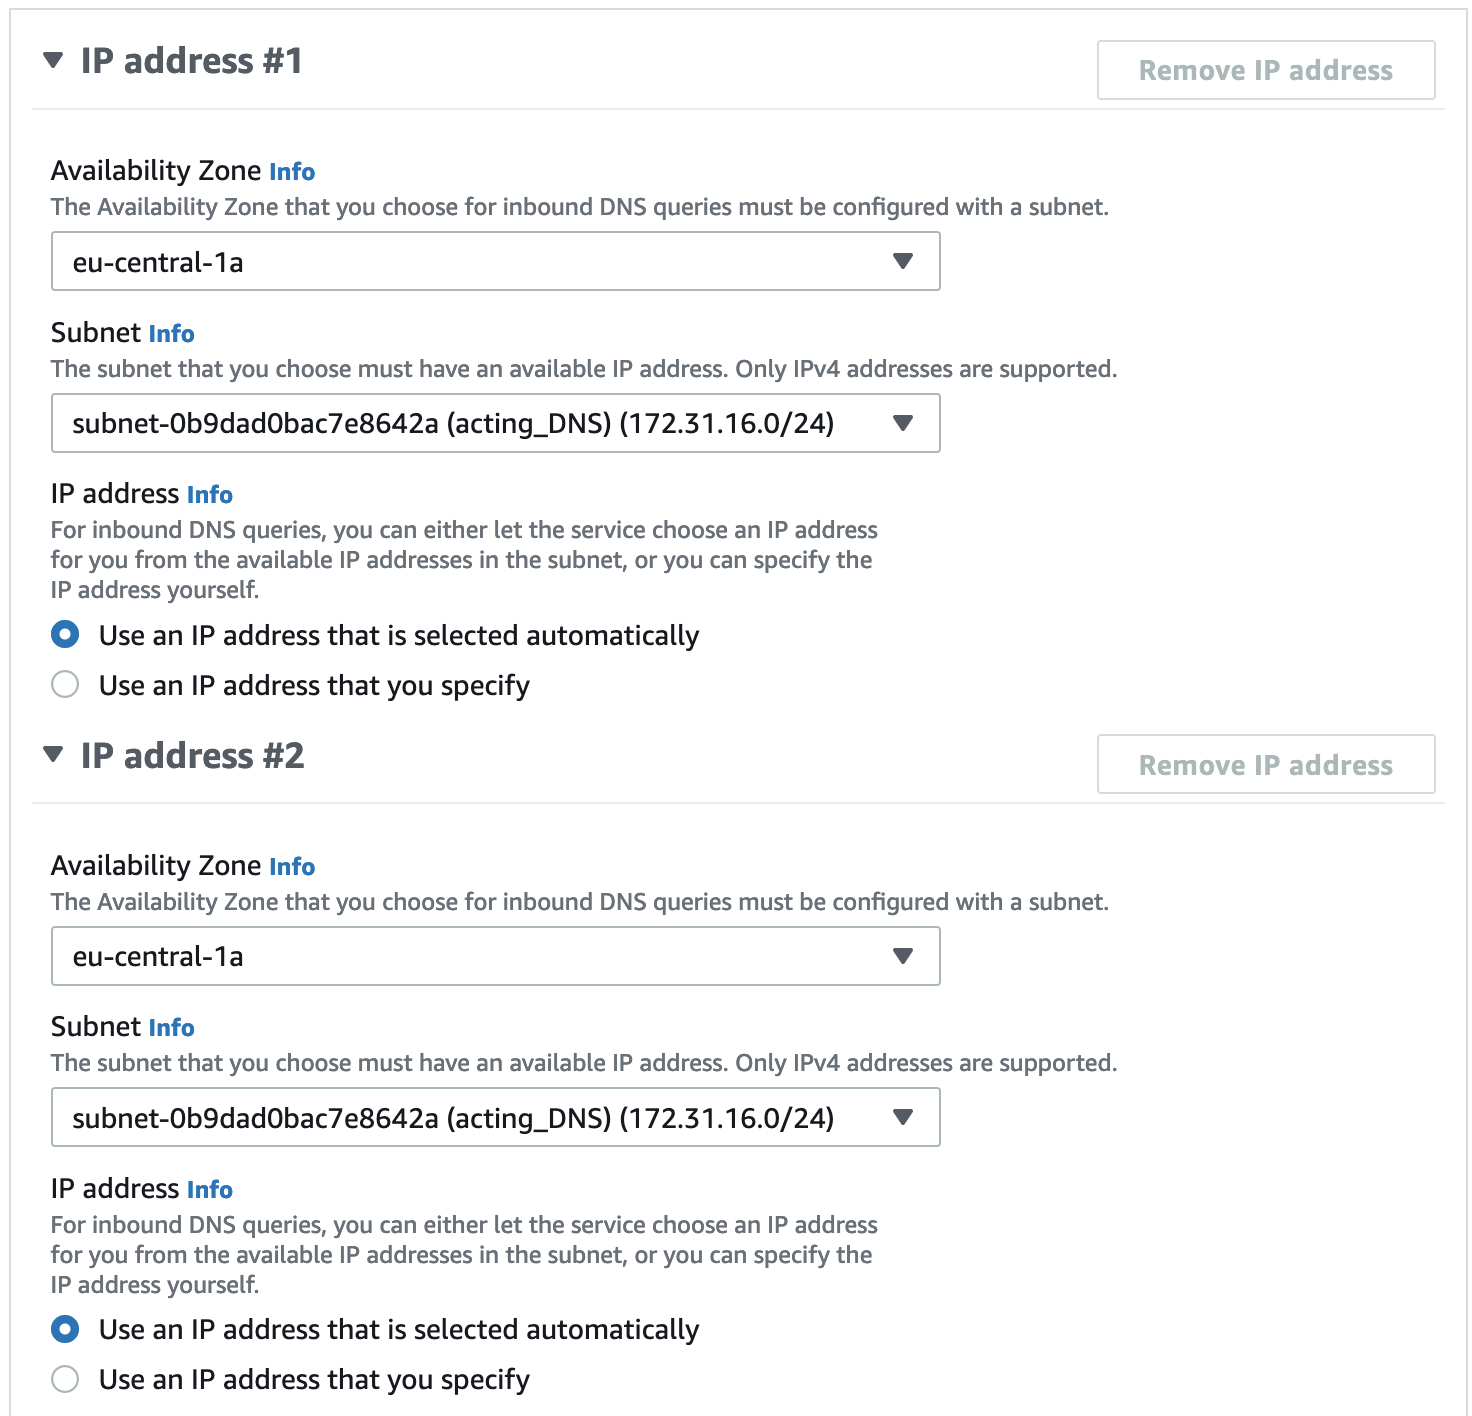
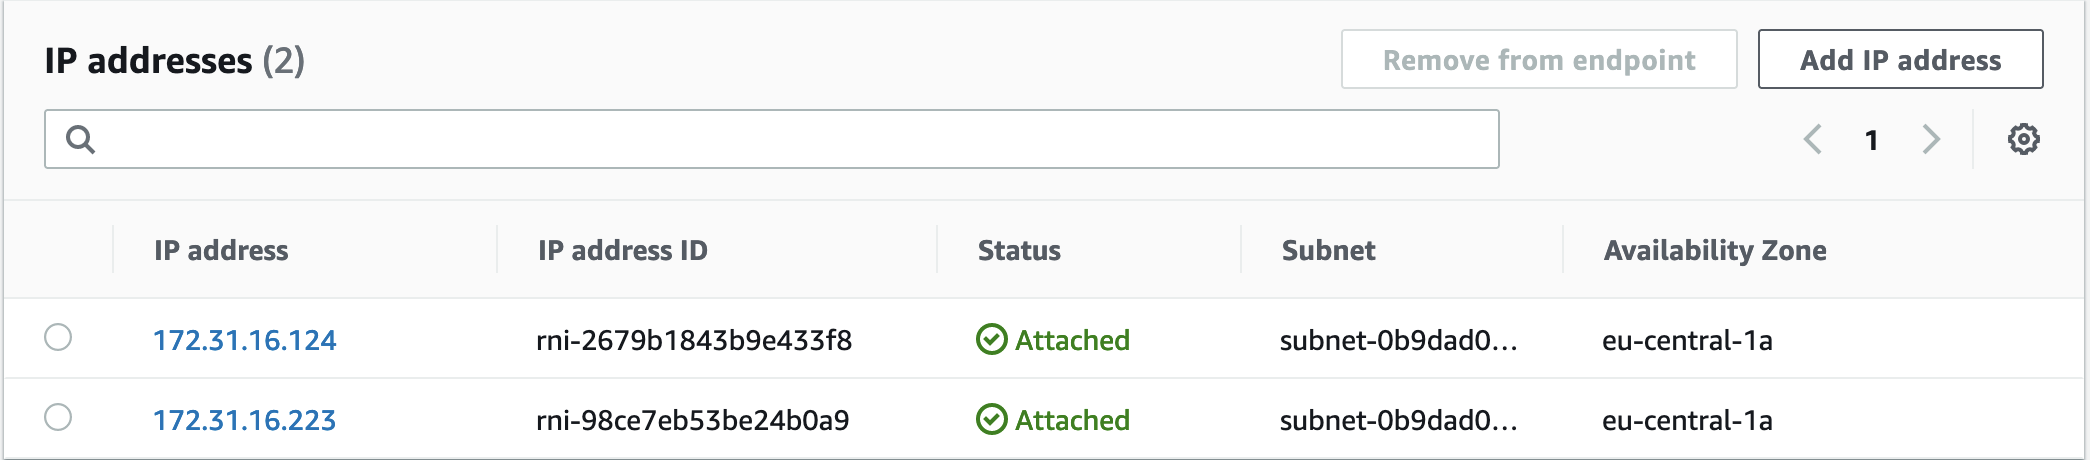
Once submitted, it can take some time to create the end points. Once created, you will find them in the Route 53 portal, under Resolver > Inbound endpoints.
Note down the IP address of these endpoints.
Step 3 : DNS forwarding
Now that we have created these two resolver endpoints we need to assign this resolver as the main DNS resolver for your EMnify SIM card. So login to your EMnify account and under Device Policy, select the policy attached to your devices.
Click on More Options > Custom DNS
Now add the two endpoint IPs you created in the previous step.
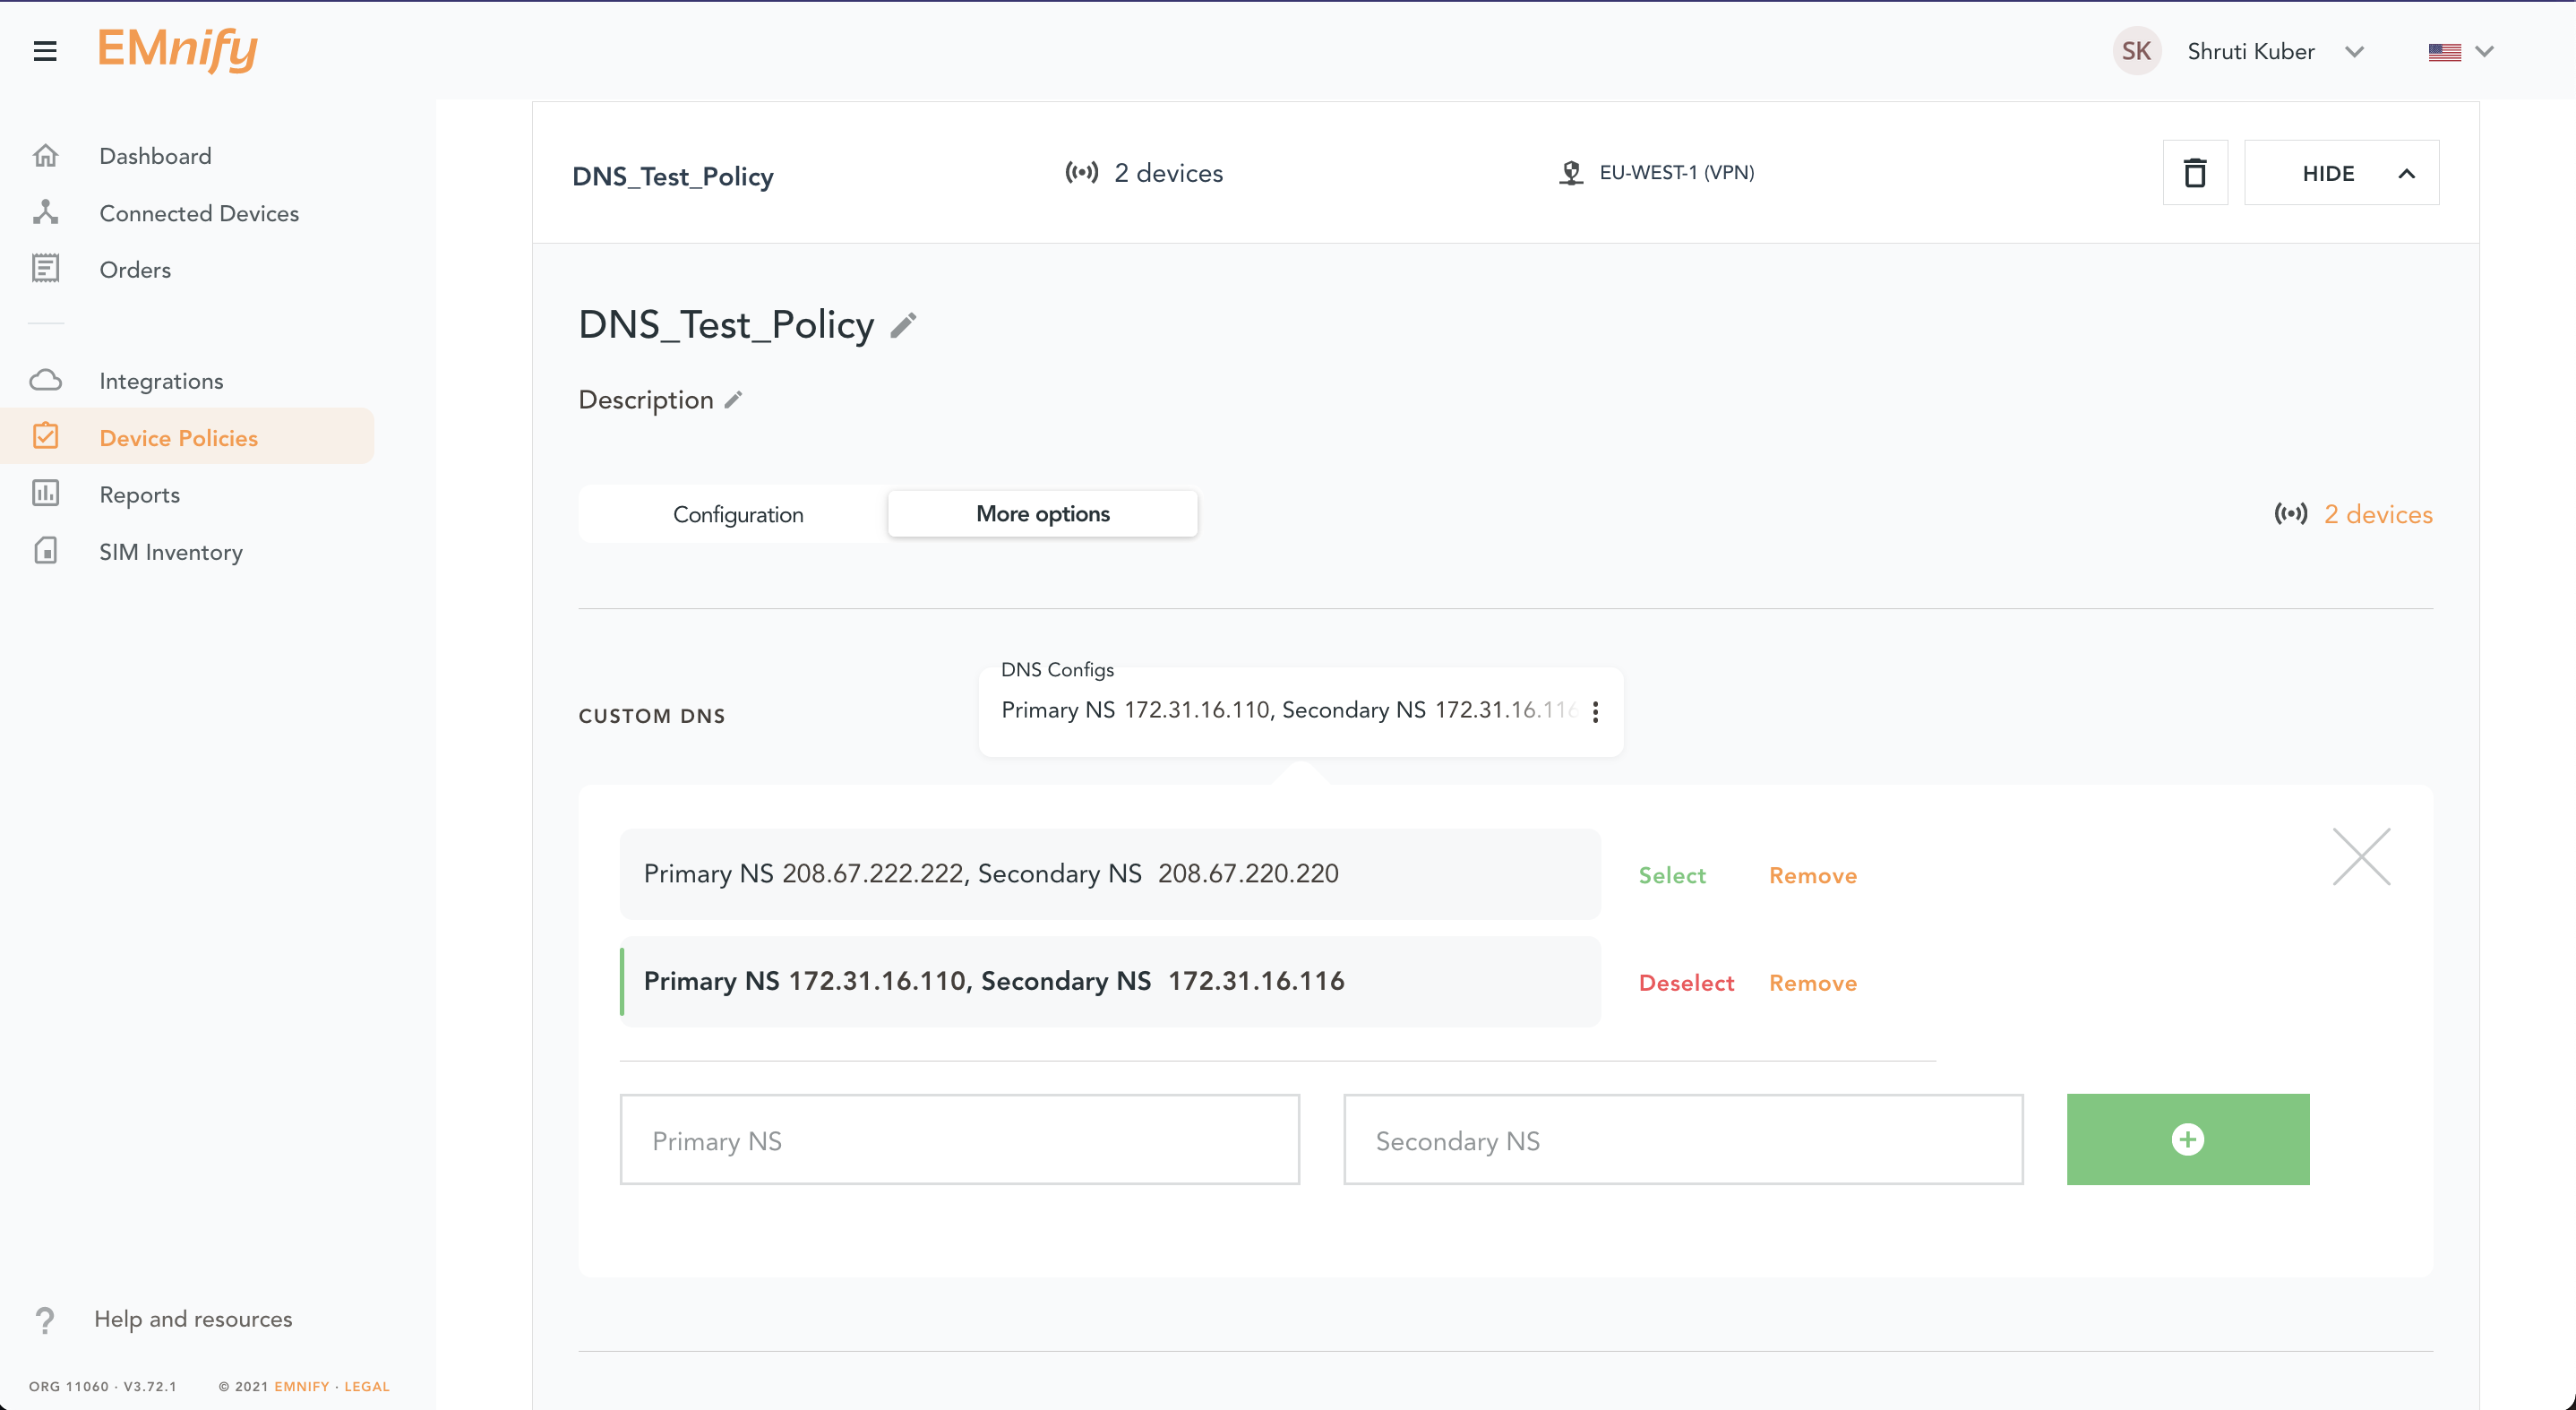
Click on Select to select the custom DNS. Reset the connectivity of your devices and check if you can still access the internet. If you are checking this on a Raspberry Pi or a similar device, type the following command in your terminal and it should reply to you with the IPs of the new DNS resolvers.
$ cat /etc/resolv.conf
# Generated by resolvconf
nameserver 172.31.16.124
nameserver 172.31.16.223
Step 4 : Creating a list of domains
Now that you have successfully forwarded your DNS queries to this custom DNS resolver, we need to create a list of websites you want to block. In my use-case, I want to block the usage of YouTube so that the devices don't consume a lot of unnecessary data.
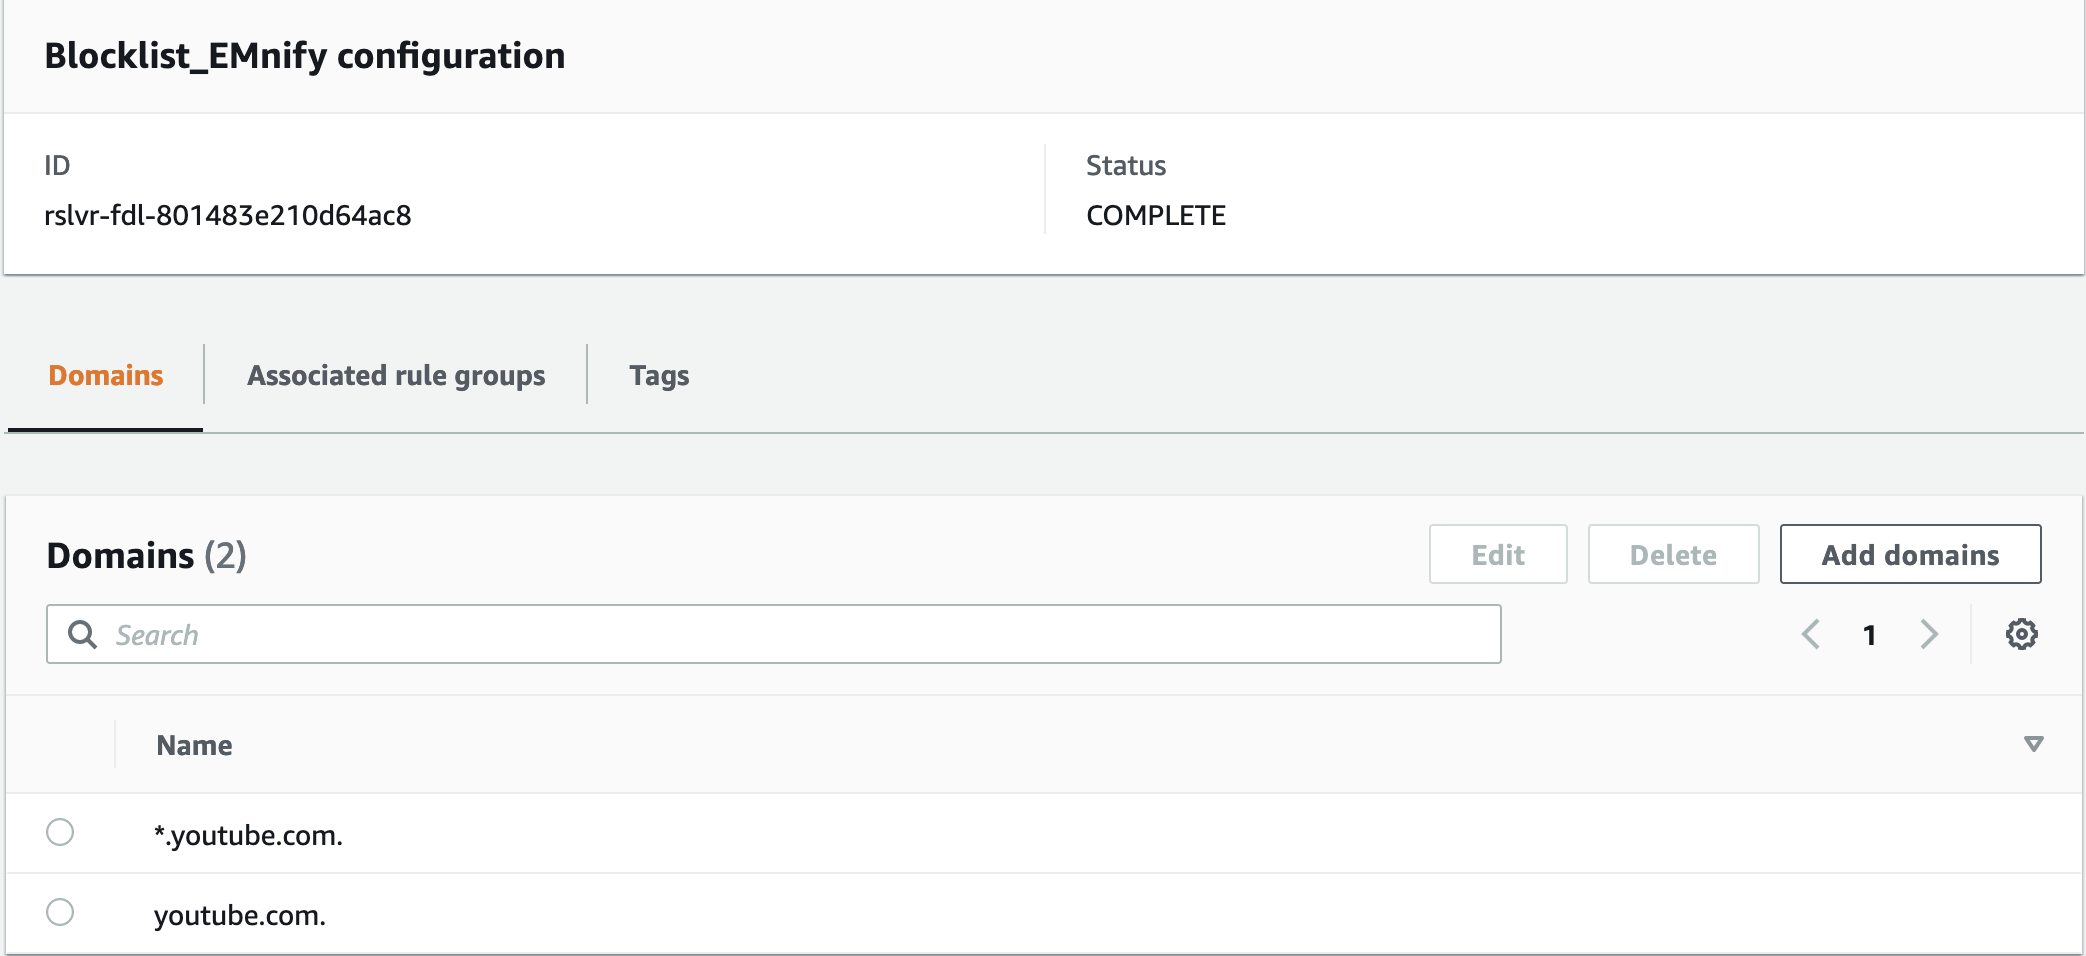
Go back to your Route53 portal and navigate to DNS Firewall > Domain lists
Click on Add domain list. Give it a name and enter the domain names you want to block. Here I have entered "youtube.com" as well as "*.youtube.com" to block any sub domains. Save this list.
Step 5 : Blocking the list
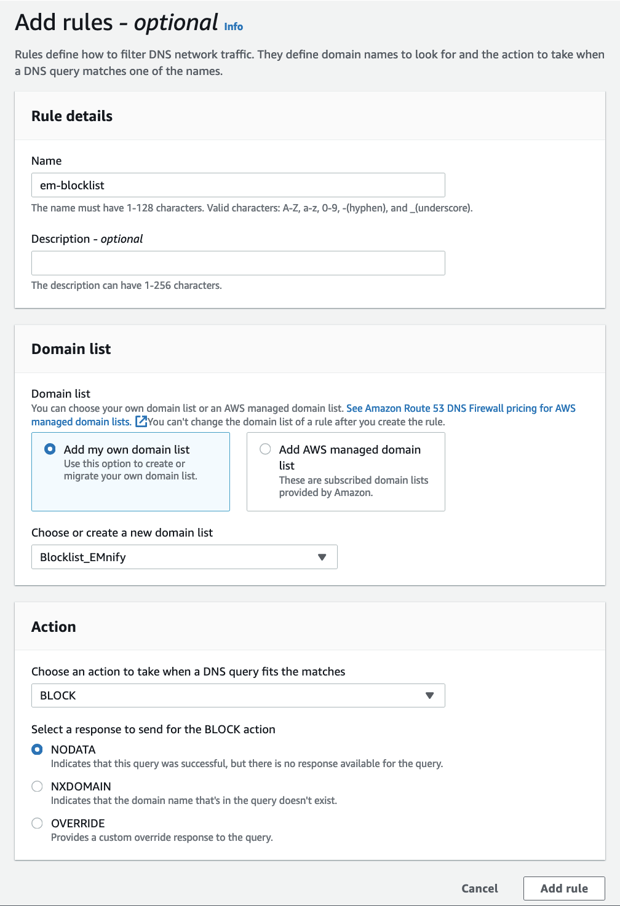
Now that you have created the list, you need to create a rule to block all the domains in this list. Navigate to DNS Firewall > Rule groups and add a new rule group.
Give it a name. Now in this rule group, you can add several rules to block, allow or alert when DNS queries are made.
Create a new rule > call it BlockYouTube > Add my own domain list.
In Actions > select Block and add the rule.
Step 6 : Associate Rule to VPC
Now we need to associate this rule group to our VPC where the resolver endpoints are. So select the rule group you created and click on VPCs associated.
Click on Associate VPC and select the VPC where the DNS resolver is. This could take a minute to associate. Once the status is updated to Complete, you are done. 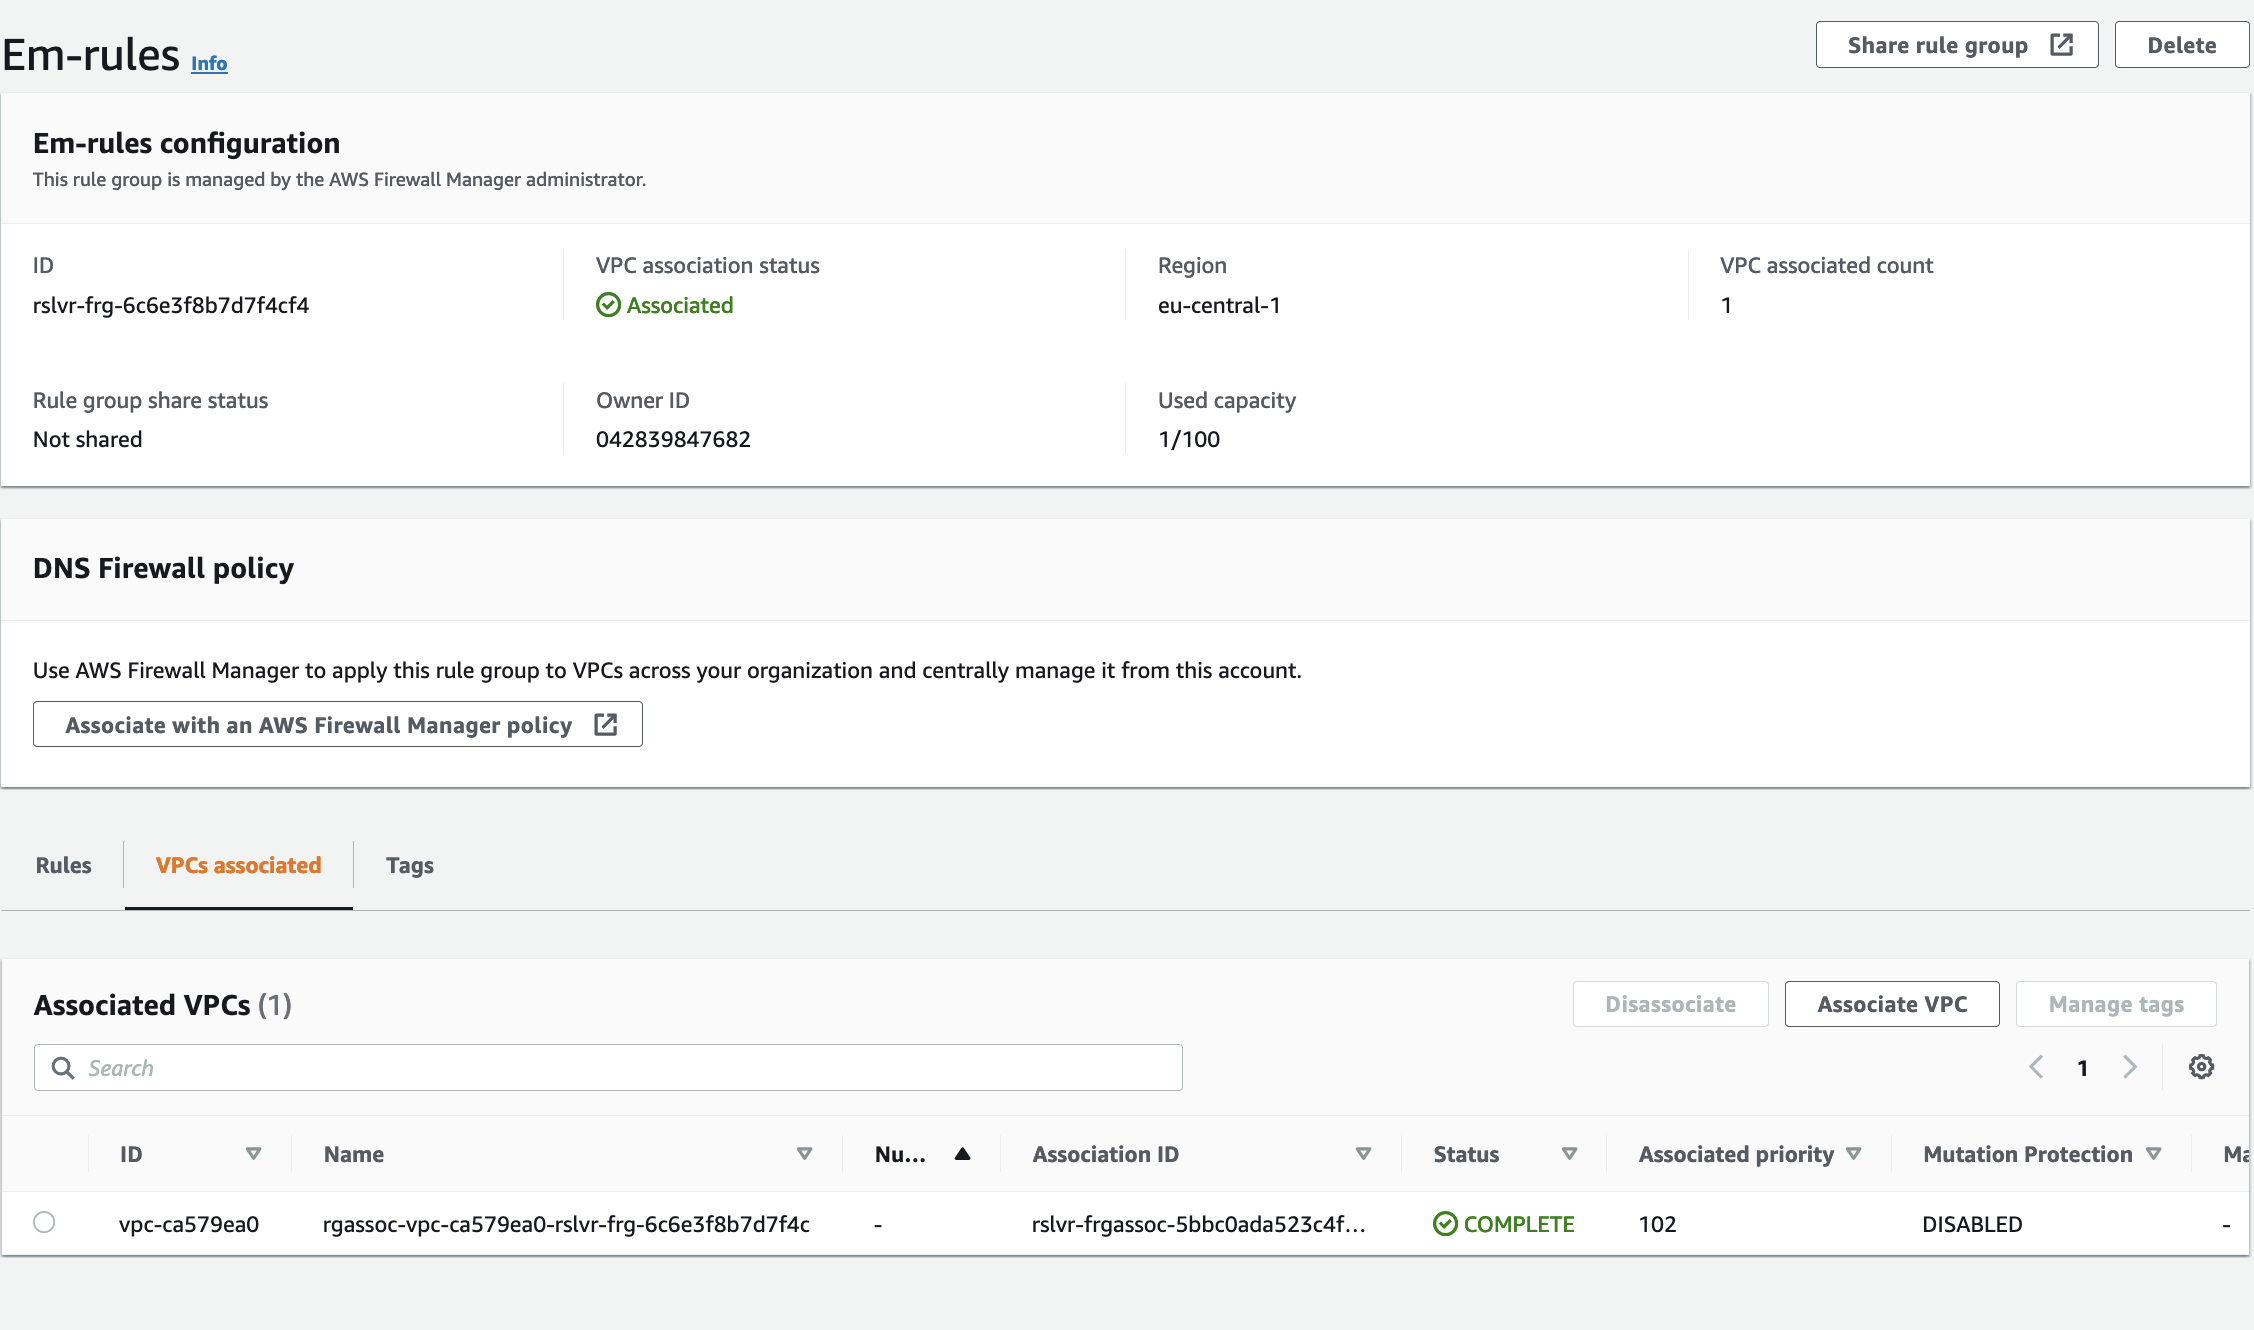
Open your phone with the EMnify SIM to check whether you can still access YouTube. If you are on the RPi, type the following command and you should get no response.
$ host youtube.comSo you have successfully implemented DNS filtering using the EMnify platform. By doing this just once, you have implemented this filtering for all your SIMs. You can also do this if you want to restrict your devices to only specific domains. In this case, you would create an ALLOWLIST instead of a BLOCKLIST.
Let me know if you were able to implement this or if you have any questions. If you want to suggest new use-cases or read more of them, subscribe to our developer newsletter below.
Stay Connected!

Shruti Kuber
Shruti Kuber is a Developer Advocate and Community Manager at emnify.