
emnify offers the possibility to setup an IPsec to keep all data communication between your application server and our mobile core private. Thanks to the emnify CloudConnect you can create an IPsec in a few easy steps.
1. IPsec configuration on emnify side
1.1 Portal configuration
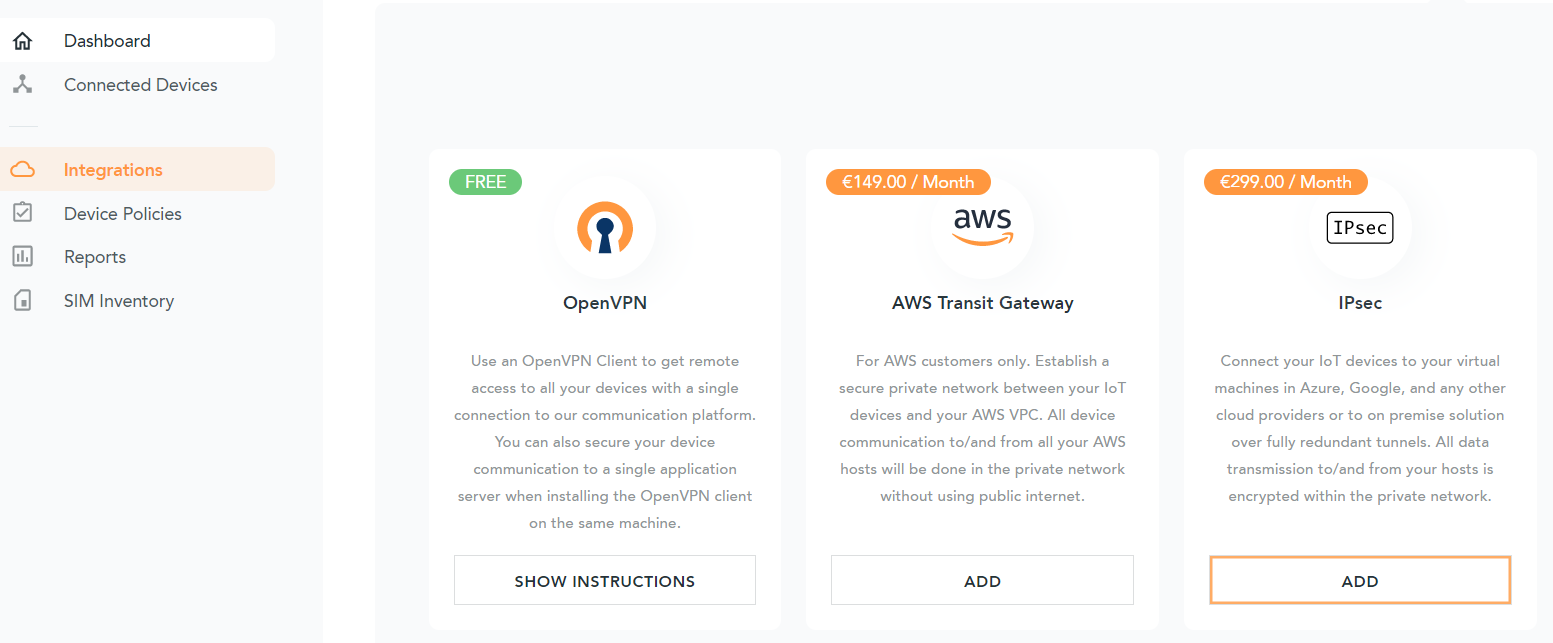
To create an IPsec, click on Integration in the Portal menu. Scroll down to the Secure Connection section and Click on ADD under IPsec.
 Fill out the form:
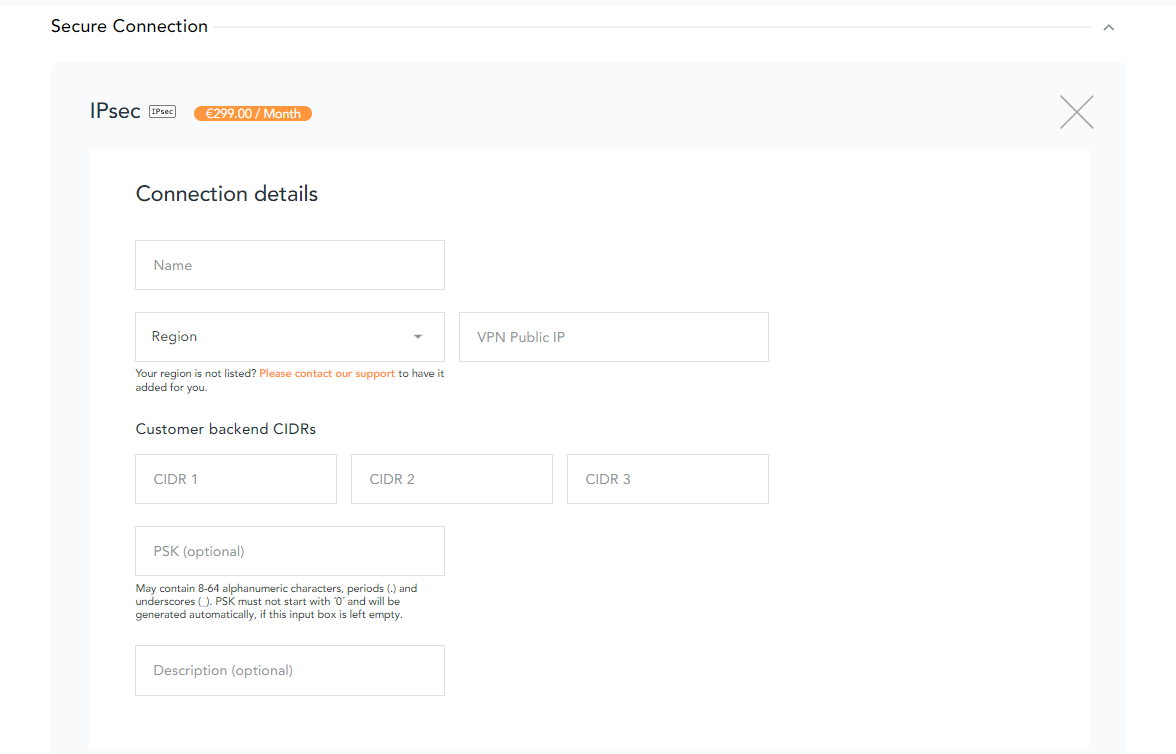
Enter the requested information:
- Enter a name of your choice;
- Choose the region to which you would like to connect to. Make sure you select the same region in your Service Profile;
- Enter your VPN Public IP;
- Add up to 3 CIDRs used in your VPC. Select the CIDRs to which data will be sent to. Note that the CIDRs must be valid RFC 1918 private address prefixes and the ranges must be between /30 and /22. The default /16 CIDR will be declined. If the CIDR is already taken on our side, a warning will be displayed when you try to validate the attachment because AWS does not support overlapping IP addresses;
If the IP range is not correct or already taken, a warning will be directly displayed and you will have to enter a different range. - PSK will be created automatically;
- Add a description of your choice.
- Click on create now once you have reviewed the entered details. Please note that you cannot update the created VPN. If you need to change settings, you will have to delete it and create it again.
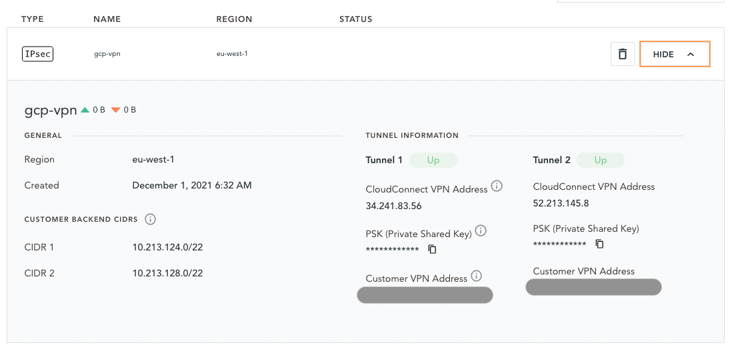
Once the setup is complete, the status of the VPN will be "pending" until the automatic IPsec creation on our side is complete. Once the status is "not connected", you can display the VPN configuration which you need to apply on your side.
NOTE: Once the attachment is created, you will be billed in the end of the month as notified when creating the CloudConnect request
2. IPsec configuration on Customer's side
2.1. Redundancy
Two tunnels have been created. This is thought for redundancy. We advise you to configure both on your side as well but this is optional.
To handle the configuration, you can use the help available on the amazon knowledge base: https://docs.aws.amazon.com/vpc/latest/adminguide/Welcome.html. Simply select the gateway device you are using and apply the configuration.
2.2. Firewall rules (incoming traffic)
Traffic coming from emnify endpoint IP addresses need to be allowed on the customer's side. This can be done by enabling our complete IP range or only the ranges assigned to your emnify account:
- If you can, allow traffic from the following ranges
-
- 10.192.0.0/12
- 100.64.0.0/10
- 10.112.0.0/12
- 10.176.0.0/12
- You will then be sure that traffic from your connected devices will be allowed
- If you have overlapping rules, you can allow only the IP ranges assigned to your account. In this case, you need to update your configuration each time a new IP range is assigned to your account.
-
.png?width=705&name=image%20(15).png)
2.3. Routing tables (outgoing traffic)
The routing table also needs to be updated as all traffic going to you devices (emnify IP ranges) need to go through the IPsec. Here as well two solutions are possible:
- If you can, send all traffic to the following ranges through the IPsec
- 10.192.0.0/12
- 100.64.0.0/10
- 10.112.0.0/12
- 10.176.0.0/12
- If you have overlapping rules, you can configure only IP ranges assigned to your account. In this case, you need to update your configuration each time a new IP range is assigned to your account. Secure Connection
.jpg)
Jean-Eudes Ambroise
Director of Customer Success at emnify, Jean-Eudes is an expert in IoT.