
Stream connectivity metadata directly to AWS S3 in real-time
Before each device is able to send data to the application it needs to communicate with the mobile network to ensure that the data is allowed to be send over the network. This communication happens through signaling events which is usually hidden from the application.
With the EMnify DataStreamer this connectivity metadata is made available to your cloud platform in real-time for detailed insights on events and usage data of your devices. 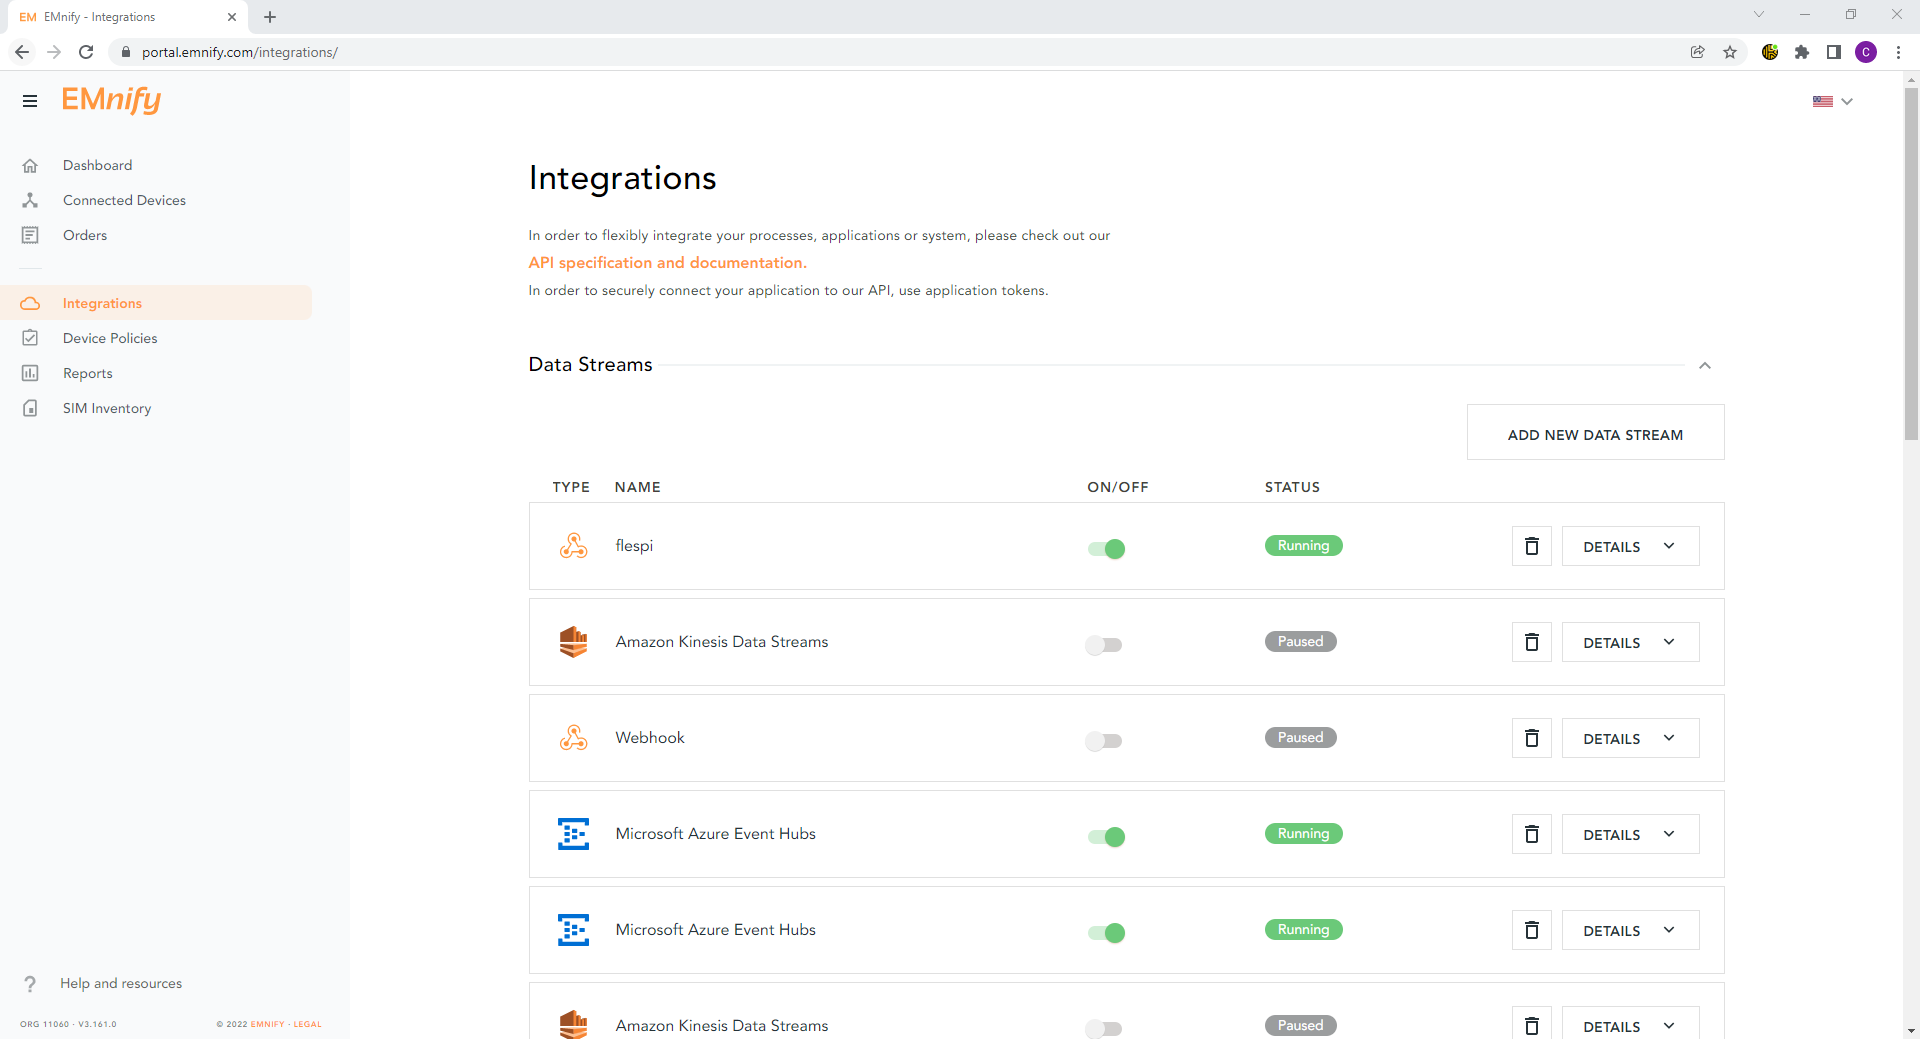
Prerequisites
- A device with a cellular modem and EMnify SIM card
- An AWS account
Benefits
- connectivity metadata integrated into operational dashboards for service teams
- allows faster triaging between device, connectivity and application issue
- insights about network attach, data and roaming issues or when device is above service limit
- overview of service (data, SMS) usage and cost per device
- intra-cloud delivered to S3 without need for managing public IPs
S3 Integration Steps
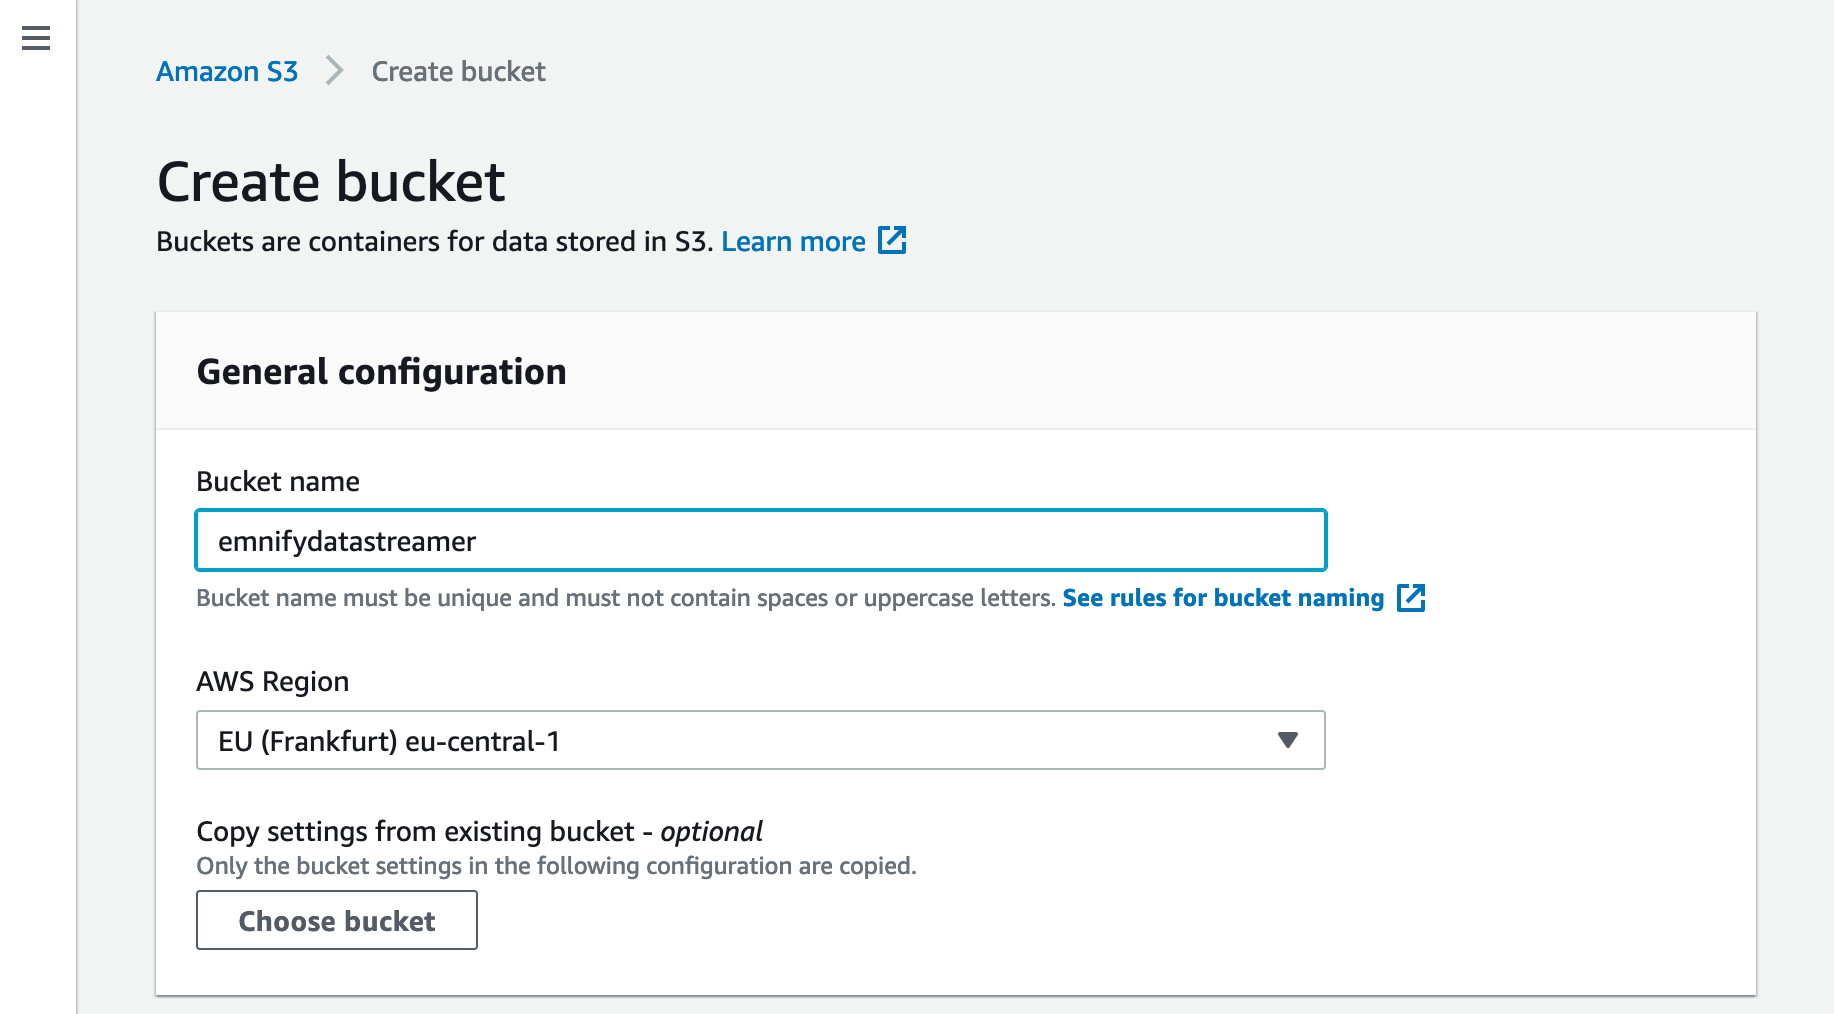
- In your AWS console, navigate to the S3 service and create a bucket, note the name of the bucket.
- In IAM -> Policies click Create Policy to create a policy for the service S3 which allows
PutObjectwrite permissions to the S3 bucket.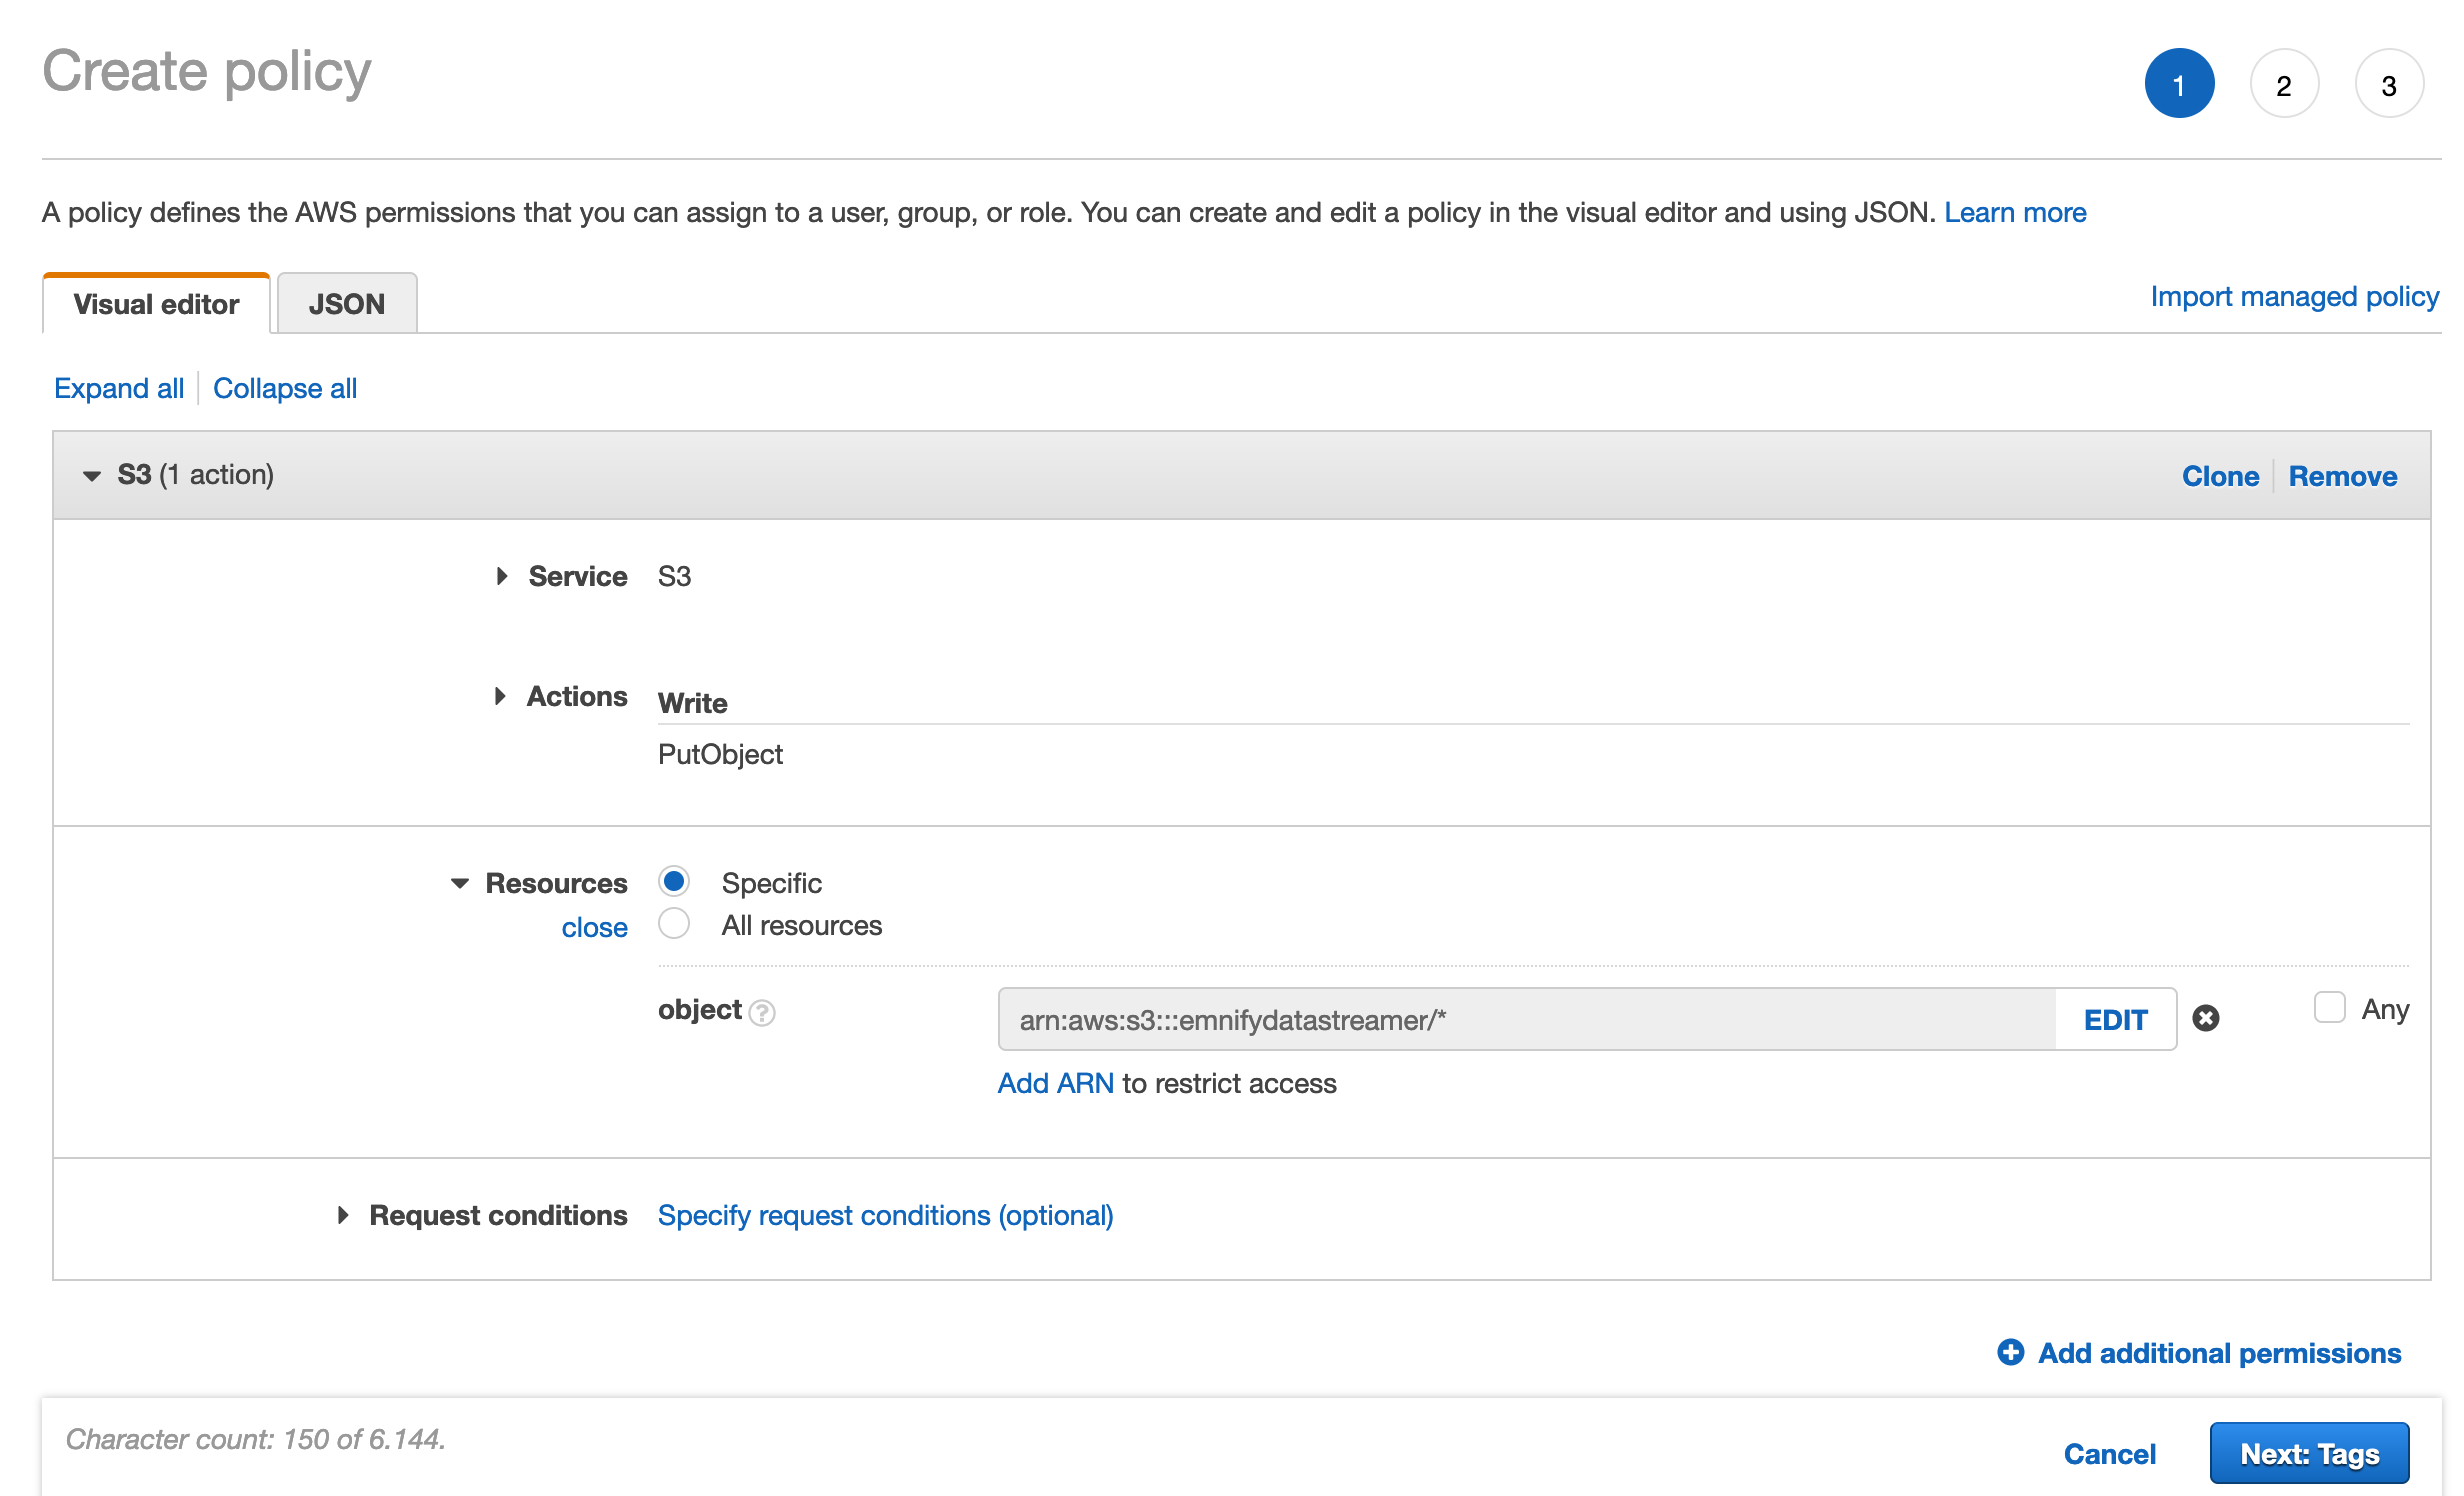
- In IAM -> Roles, click Create Role for the S3 use case and click Next: Permissions
- Attach the policy created in step 2 and click Next: Tags, then Create Role.
(Important: Make note of the new Role's ARN as it will be needed for adding a new data stream in the EMnify UI)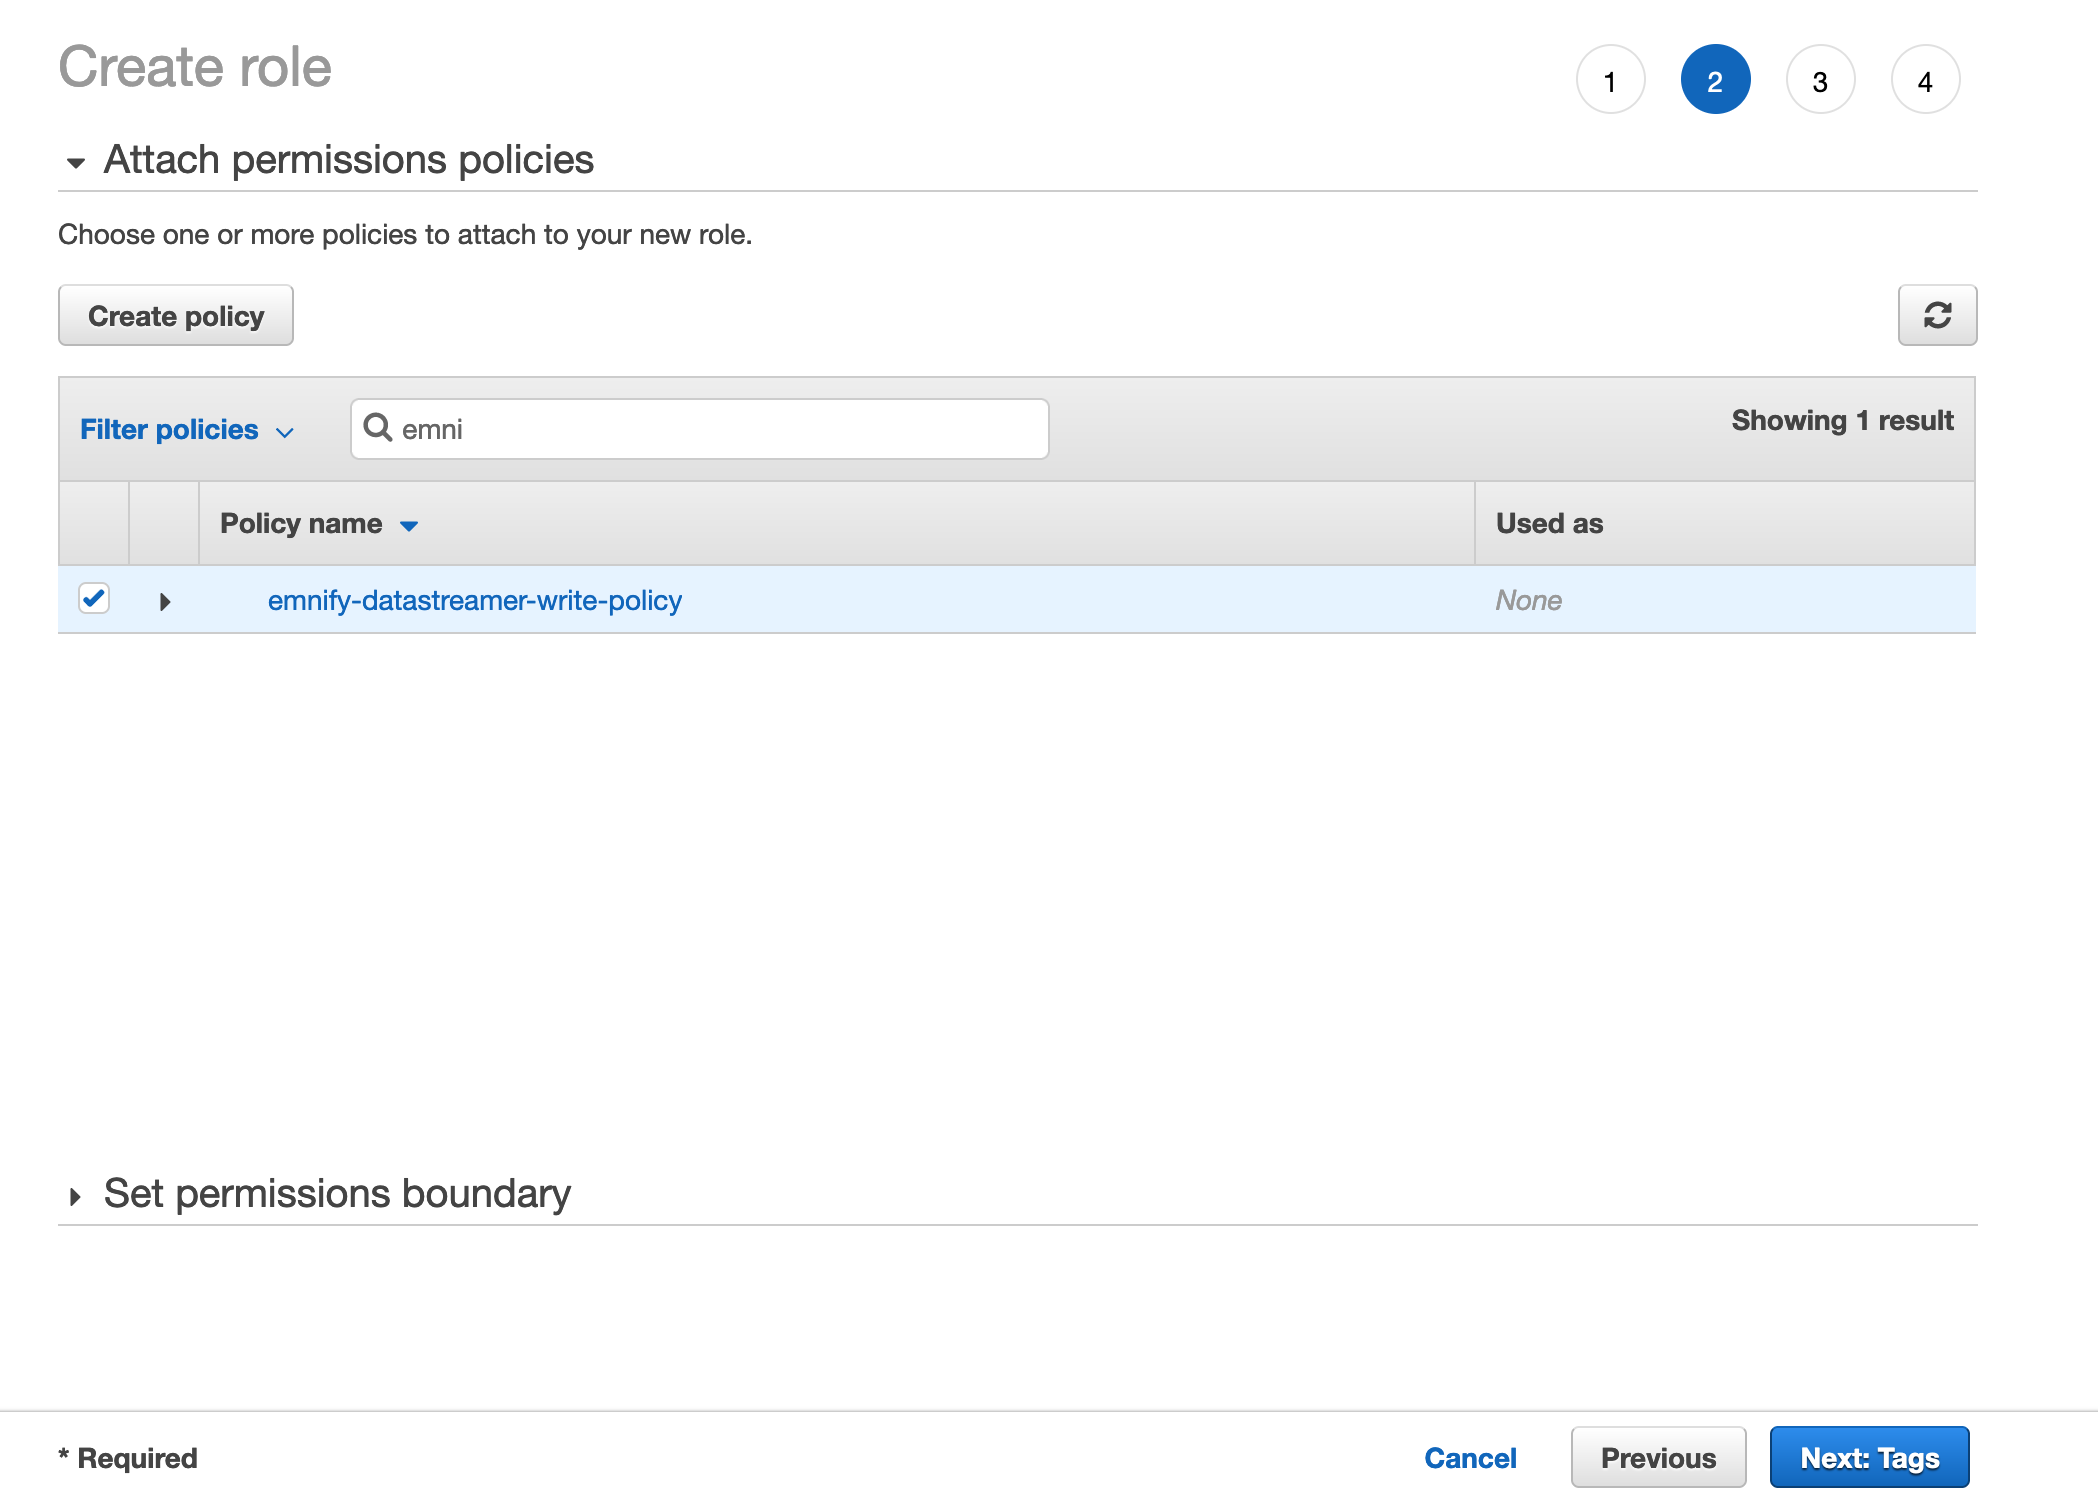
- Edit the newly-created role and click Trust Relationships -> Edit Trust Relationships
- Copy the policy document JSON below and replace your organization ID after org- to allow write access:
To know your organization ID, send a GET request to the EMnify API, or find it on the EMnify portal under Secure Connections.{ "Version": "2012-10-17", "Statement": [ { "Sid": "", "Effect": "Allow", "Principal": { "AWS": [ "arn:aws:iam::884047677700:role/datastreamer" ] }, "Action": "sts:AssumeRole", "Condition": { "StringEquals": { "sts:ExternalId": "org-1234" } } } ] }
Adding Stream in the EMnify Portal
In to the EMnify portal, navigate to Integrations to create, inspecting and manage Data Streams:
- Click Add New Stream and under AWS S3 click ADD
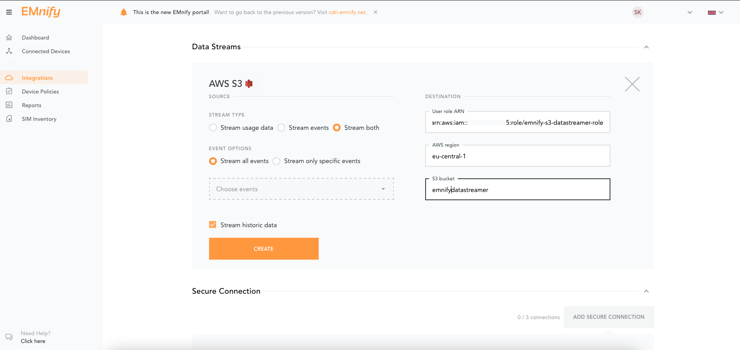
- Enter the details for the S3 bucket:
-
- User Role ARN - the
Role ARNcreated at Step 4 above - Region - the region of the S3 bucket, this example uses eu-central-1 (Frankfurt)
- S3 bucket - the name of the S3 bucket to deliver data to, this example uses emnifydatastreamer
- User Role ARN - the
Verifying the integration
Newly-created data streams are immediately active and should show a green Running status indicating a 200 HTTP response code when correctly configured.
If the configuration is invalid, a warning message will be displayed indicating incorrect configuration.
Connectivity data as .CSV files directly in S3
When using the S3 integration, platform details arrive in the destination bucket as .csv files which can be directly read by other AWS services:
Next Steps
As connectivity data is now arriving in real-time, it's simple to implement other services which can react to any events which interest us. One useful integration that can be quickly launched is a simple notification system which delivers Slack alerts based on the contents of platform events.
To get started with this example integration, see the Slack notifications via AWS Lambda article or directly launch the project using a cloudformation template provided in the EMnify GitHub repository.

emnify
The content team of emnify is specialized in all things IoT. Feel free to reach out to us if you have any question.